Your Guide To Spring Mulch In Indiana
Your Guide To Spring Mulch In Indiana
Your Guide To Spring Mulch In Indiana
When the official first day of spring comes, Hoosiers are anxious to get to work in their mulch beds. A few new plants, some perennial divisions, and a fresh layer of mulch is a surefire way to welcome the warmer weather and quality time spent outdoors.
Be sure to wait for the final snowflakes to fall before starting in your landscape.
Clean out your Mulch beds
Not only should you clean out the debris from your mulch beds (leaves, sticks, etc.), but landscapes with clean edges also enhance the appearance and give a more professional look. Both clean up and edging should be completed before installing new mulch. Use an edging shovel or power edger to accomplish clean lines. Pro tip: use your garden hose as a guide to create nice, flowing curves to cut.
Consider your plants
If you are planting any new annuals, perennials, trees, or shrubs in your landscape, you must wait until after the last frost of the season. This will ensure that the plants get a great start in their new location. An old wife’s tale recommends waiting to plant even until after Mother’s Day.
We always recommend planting BEFORE you install new mulch to keep your mulch beds looking fresh as long as possible.
Order your mulch
We try to make ordering mulch as simple as possible. The first thing you need to know is how many cubic yards of mulch you need to get the job done. From there, you can browse our options online or call our office and we can make a recommendation.
On your chosen delivery date, the mulch will be dumped in your driveway per your delivery instructions. Time to get to work!
Timing is everything with Dyed Mulches
Now, you have planted your new perennials, cleaned out your mulch beds, created perfect edges, it may finally be time to mulch. If you are mulching with dyed mulch, pay special attention to the weather forecast. Dyed mulch must remain dry for 28 hours once installed in your landscape, or the dye may run off the mulch.
Apply a pre-emergent before Mulch
Right before installing mulch is the time to prevent weeds. Apply a pre-emergent herbicide to prevent weeds from germinating. Always read the product label before application.
Time to Mulch
You can now start spreading your mulch. You can use your hands or rake to spread it all over. The ideal thickness is 2-4 inches. If you spread the mulch too thin, weeds may emerge more easily. If you spread the mulch too thick, water may not reach the soil to hydrate plants.
Say NO to Mulch Volcanoes
Mulch volcanoes occur when mulch is piled around the trunk of a tree or shrub. These are detrimental to the health of the plant by encouraging disease and decay, and preventing proper root development.
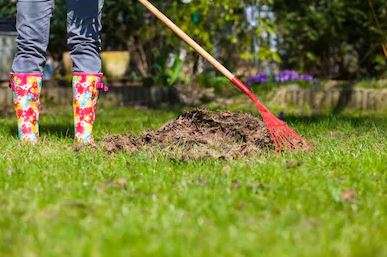
Maintaining your Mulch
A month or so after your mulch has been spread, check for compaction. If the mulch is compacted, use a rake to loosen it. This allows for air and water to pass through, which helps prevent the growth of fungus and restores a fresh appearance.

Mulching Perennials

Mulching Perennials
Most plants, including perennials, benefit from having mulch around their roots year-round. Organic mulch like shredded bark or hardwood makes our gardens look more polished, but it also serves several useful purposes including:
- Shading plants’ roots and keeping the soil cooler, which makes the roots healthier
- Retaining soil moisture longer
- Preventing weeds from growing up into the plants
- Adding nutrients to the soil as the mulch disintegrates over time
Inorganic mulches like small stones or gravel can also be used, but they will not have the added benefit of enriching the soil since they do not break down. Stone can be useful in very windy locations where lighter mulch tends to blow away and is sometimes used on steep slopes where lighter mulch would wash away. Just beware that if you ever decide to switch from stone to organic mulch, it is back breaking work to remove those stones.
Whichever type of mulch you use, it is important to prevent it from touching the crown (base) of the plant. Spread your mulch carefully so that it lays nicely under your plant’s foliage but away from the crown. When mulch touches the crown, it is an invitation to plant rot and pest issues.
If you plant any perennials or shrubs in the fall, be sure to lay 3-4 inch layer of mulch around them to prevent frost heaving during the winter months. The mulch will moderate the soil temperature so it remains consistent throughout the winter.
Perennial gardens benefit greatly from having a layer of shredded leaves placed over them in late fall of early winter after the plants have gone dormant. When you are raking earlier in the fall, shred and bag some of the leaves to use for this purpose. By spring. the shredded leaves in your garden beds will have mostly broken down and their nutrients will enrich the soil — it’s free fertilizer!
Original article written by Susan Martin and published by Proven Winners.

Musselman Landscape Solutions offers opportunities for retirees
Musselman Landscape Solutions offers opportunities for retirees
Article published by the Current on 3/7/22
Written by Anna Skinner
In the past, Musselman Landscape Solutions has found a bountiful source of employees in an unlikely demographic – retirees.
The Noblesville-based landscape company has had up to 10 retirees employed at once, but now only employs one at the moment. The company found its first retired employee by accident. Original owners Steve and Marilyn Musselman had been friends with Skip Peck for nearly 50 years. When Peck retired from the grain elevator business, Steve Musselman was just starting his business.
“He got to the point where he needed help and he called me one day, and since I was retired, he asked if I would come out and help him for a couple of weeks,” said Peck, a Noblesville resident, who has worked for the company since 1991.
Now 77, Peck recently scaled back his work by only driving landscape trucks in the spring when business picks up.
“I’m still working at my age because I feel better when I get up and go to work,” he said.
Sales and Marketing Specialist Samantha Boram Guffy said drivers have flexible schedules, which is attractive for someone who is retired.
“We have people that call in and customers ask for Skip, specifically. A lot of our drivers over the years have made friends with our customers and they ask for them by name,” she said. “They really enjoy it.”
Peck said he has always regarded relationships as an important part of life.
“I have been delivering to the same customers for 20 years or more, and these relationships get formed,” he said. “It’s not just a business relationship anymore. Now, they’re also friends.”
Boram Guffy said the landscaping season begins around mid-March and that drivers work nearly full-time for two months until work begins to slow.
Musselman Landscape Solutions is still in the Musselman family. It was sold to Frank Gieseking in 2017. Gieseking is married to a Musselman.
For more, visit musselmanlandscape.com/drive
Stone Landscape Ideas
Stone Landscape Feature Ideas
Stones are the ultimate enhancers when it comes to landscaping. They can convert the blandest of yards into the most beautiful area of your home. Stone landscape features are perfect for both elegance and functionality as they can handle all unpredictable weather conditions. Below is a list of amazing stone landscape feature ideas you can consider.
Natural Flagstone
Natural irregular flagstone pavers make for an amazing patio or walkway. If you are into a more rustic look, the natural flagstone details achieve the style with charm. When designing a space with natural flagstone, arrange the slabs to fit together like a puzzle. Flagstone is sturdy, durable, and resistant to weather as well as wear and tear.
Paver Patios, Driveways, and Walkways
Utilizing manufactured concrete pavers in your landscape design brings beauty and structure to your outdoor living space. When installed correctly, pavers can withstand heavy traffic and requires little maintenance. Unlike poured concrete, installing pavers allows you to play with different color options throughout the design, create unique patterns, and the finished project won’t crack over time like poured concrete slabs often do. We carry quality pavers from Unilock, Belgard, and Oberfields.
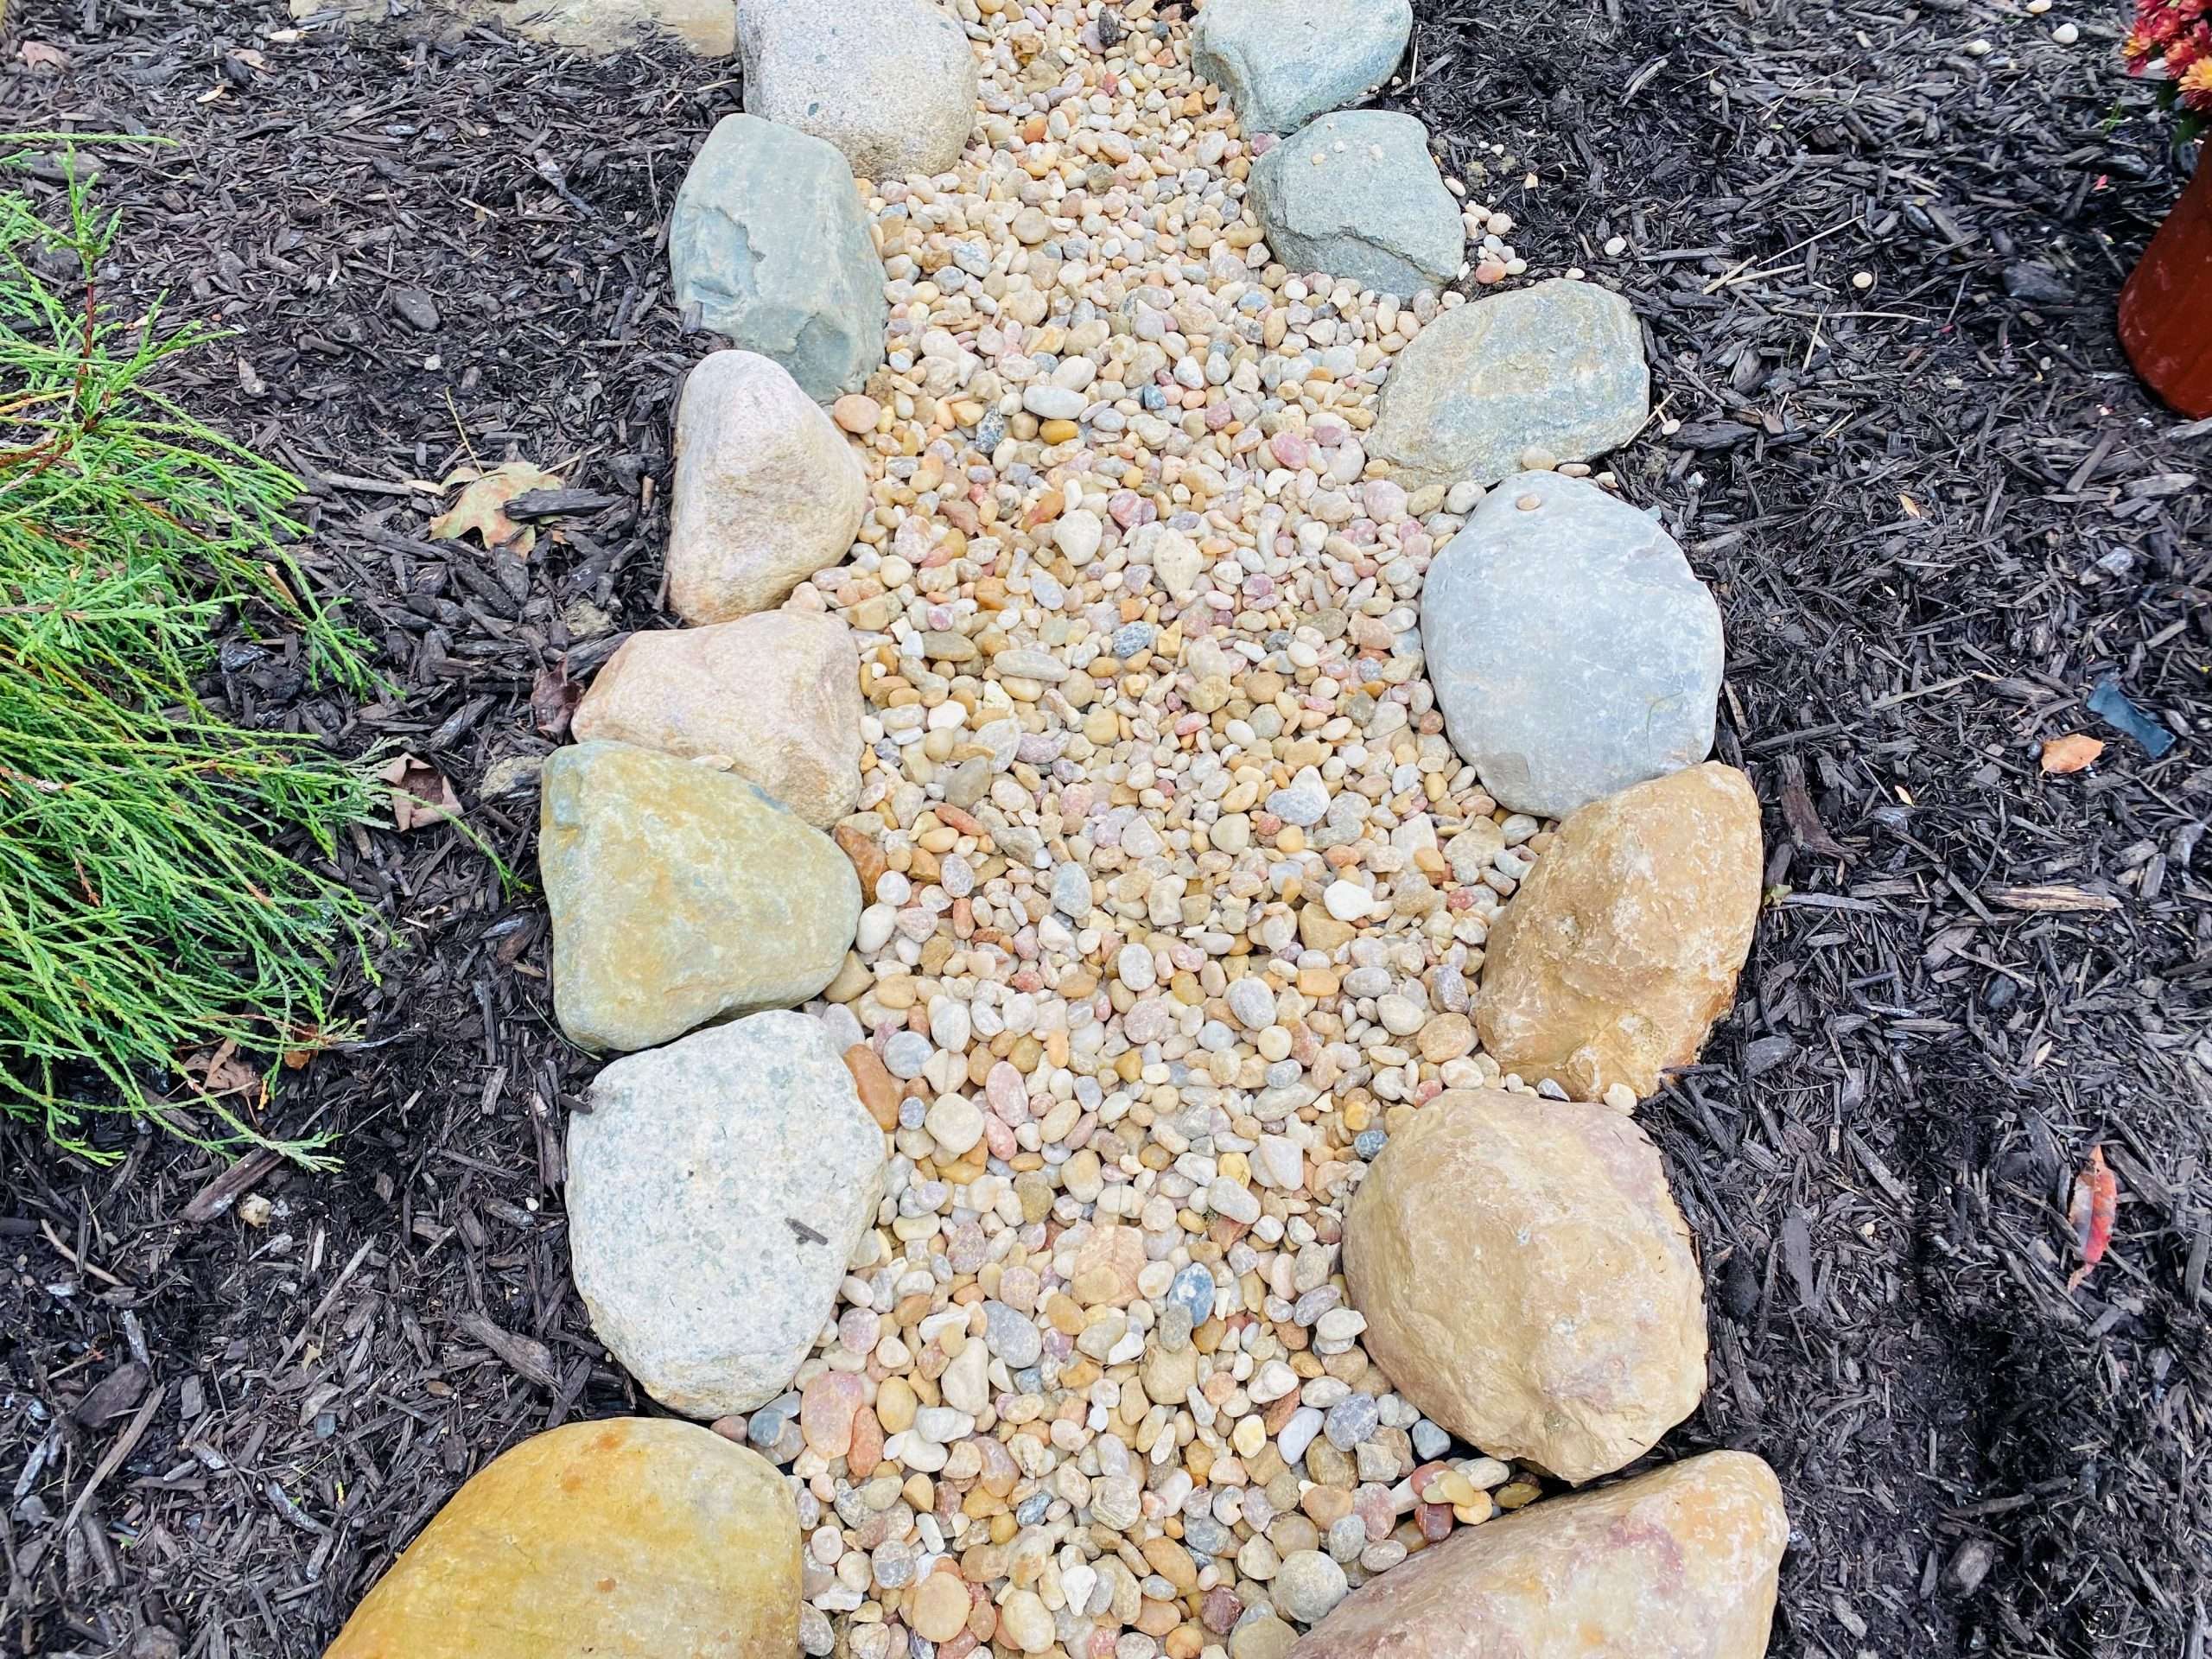
Rock Gardens
Rock gardens are a great DIY project to involve the whole family. Rocks protect soil and are especially useful in areas with little to no rainfall as they help reduce water loss from the ground while giving your landscape an enticing appeal. Rock gardens are an easy, sometime plant-free way to give a space some extra personality.
Gravel or Decorative Stone Path
A simple gravel or decorative stone path is enough to change up your landscape design. From crushed limestone to river rock or lava rock, there are endless options from all over the country to bring beauty to your design. You can line beautiful flowers along the path to make it even more colorful and appealing.
Stepped Yard with a Retaining Wall
If part of your property is sloped or on a hill, large stone accents can be incorporated to level certain spaces or create steps to better access part of the property. Installing these can be quite complicated and often involve large equipment.
Seek Expert Help for Stone Landscape Feature Ideas
When considering more complicated stone projects such as paver patios and retaining walls, you should look for an expert in outdoor living. We are the best experts offering consultation on a wide range of ideas and designs and can recommend the right contractor for your project.
Benefits of Fall Mulching
The Benefits of Fall Mulching
Caring for your lawn doesn’t stop because winter is on the way. In fact, there’s a lot of work you should do for your lawn in the fall. Adding mulch is crucial when preparing for winter and helps your garden recover from the summer heat. Here’s a look at some top benefits of fall mulching.
Control Pests and Diseases
The cold months make plants vulnerable to disease. Applying mulch protects plants from the parasites that live in the soil. Adding mulch regulates the environment and prevents bacteria and fungi from reaching your plants.
To prevent the likelihood of pathogens attacking your plants, it’s advisable to treat the plants with a citric-acid fungicide. When used with mulching, this preventative measure regulates soil and water temperature to ensure your plants are healthy. Mulch also protects your plants from slugs and snails.
Enrich the Soil
Organic matter in mulch decomposes to release nitrogen and minerals. These nutrients enrich your soil throughout the fall and promote healthier blooms in spring. Mulch also provides soil-improving microbes and earthworms, which are essential when preparing for winter.
Applying mulch to your bed nourishes your garden’s ecosystem. However, you should choose the right mulch. Some options you should consider include bark chips for trees, shredded leaves for flowers and shrubs, and straw for vegetable gardens.
Apart from enriching the soil, mulch also prevents soil erosion. Studies show that 24 billion tons of topsoil are lost in the whole world each year because of soil erosion. Mulch prevents the fertile ground from blowing away because of winter storms.
Help with Changes in Temperature
Mulch addresses issues with temperature fluctuations. For example, your soil may be baking under the sun in one week and covered in snow in the next. Mulch insulates the soil from these temperature extremes.
This is especially important for plant roots. Winter temperatures are capable of damaging the fibrous root systems in garden plants. The root hairs increase the surface area of roots, allowing a plant to absorb more nutrients.
Since the root systems are delicate and easily damaged, adding mulch insulates them from cold weather. Harsh winter conditions also affect microbes that are present in the soil. The mulch will allow the microbes to provide the necessary nutrients for your plants.
Moisture Control
Protection from temperature fluctuations goes hand in hand with moisture control. Bare soil heats up quickly because it doesn’t have the insulating layer of mulch. As a result, the soil loses moisture.
During cool evenings, mulch insulates the soil and helps retain the daytime heat. It also prevents frost from destroying your plants. Mulch also keeps the moisture from the wind and sun from drying out the soil.
In Conclusion
Fall mulching is essential for the health and visual appearance of your plants. We are renowned for our services and the quality of our products. It doesn’t matter if you’re a landscaper or just a homeowner interested in improving their landscape, we are here to help! Check out our quality mulch line up here.
Featured image courtesy of Superior Landscape Solutions.
Tips On Fixing Lawn Issues
Tips On Spotting And Fixing Lawn Issues
Every homeowner would like to have a nice lawn embracing their house. As such, you need to take care of your lawn at all times to ensure that it looks good. Unfortunately, your lawn might develop problems no matter how good you are at maintaining it.
The trick is spotting the problem and correcting it before it ruins the entire lawn. There are so many lawn issues that might pop up, and you should be well-prepared to fix them. We’ve covered some of these issues and highlighted a few tips on how to fix them.
Brown Spots
Lawns tend to develop brown patches for various reasons, including excessive nitrogen, high heat, poor soil damage, compacted soil, moisture, and high humidity. It’s easy to identify this problem because it creates yellowish-brown circular patches in your lawn. You’ll also notice a smoke ring border surrounding the brown patch.
In most cases, brown patches will disappear on their own, but it takes time. You can, however, fix the problems by applying fungicide, watering the lawn properly, applying the right amount of fertilizer, and aerating the soil.
Bald Spots
Bald patches on your lawn can be an eyesore, and it is not uncommon for your lawn to have them. Unfortunately, bald spots attract weeds, and you should act quickly before they start growing. How do you identify bald patches? Well, you just need to check for any spots that do not have grass growing.
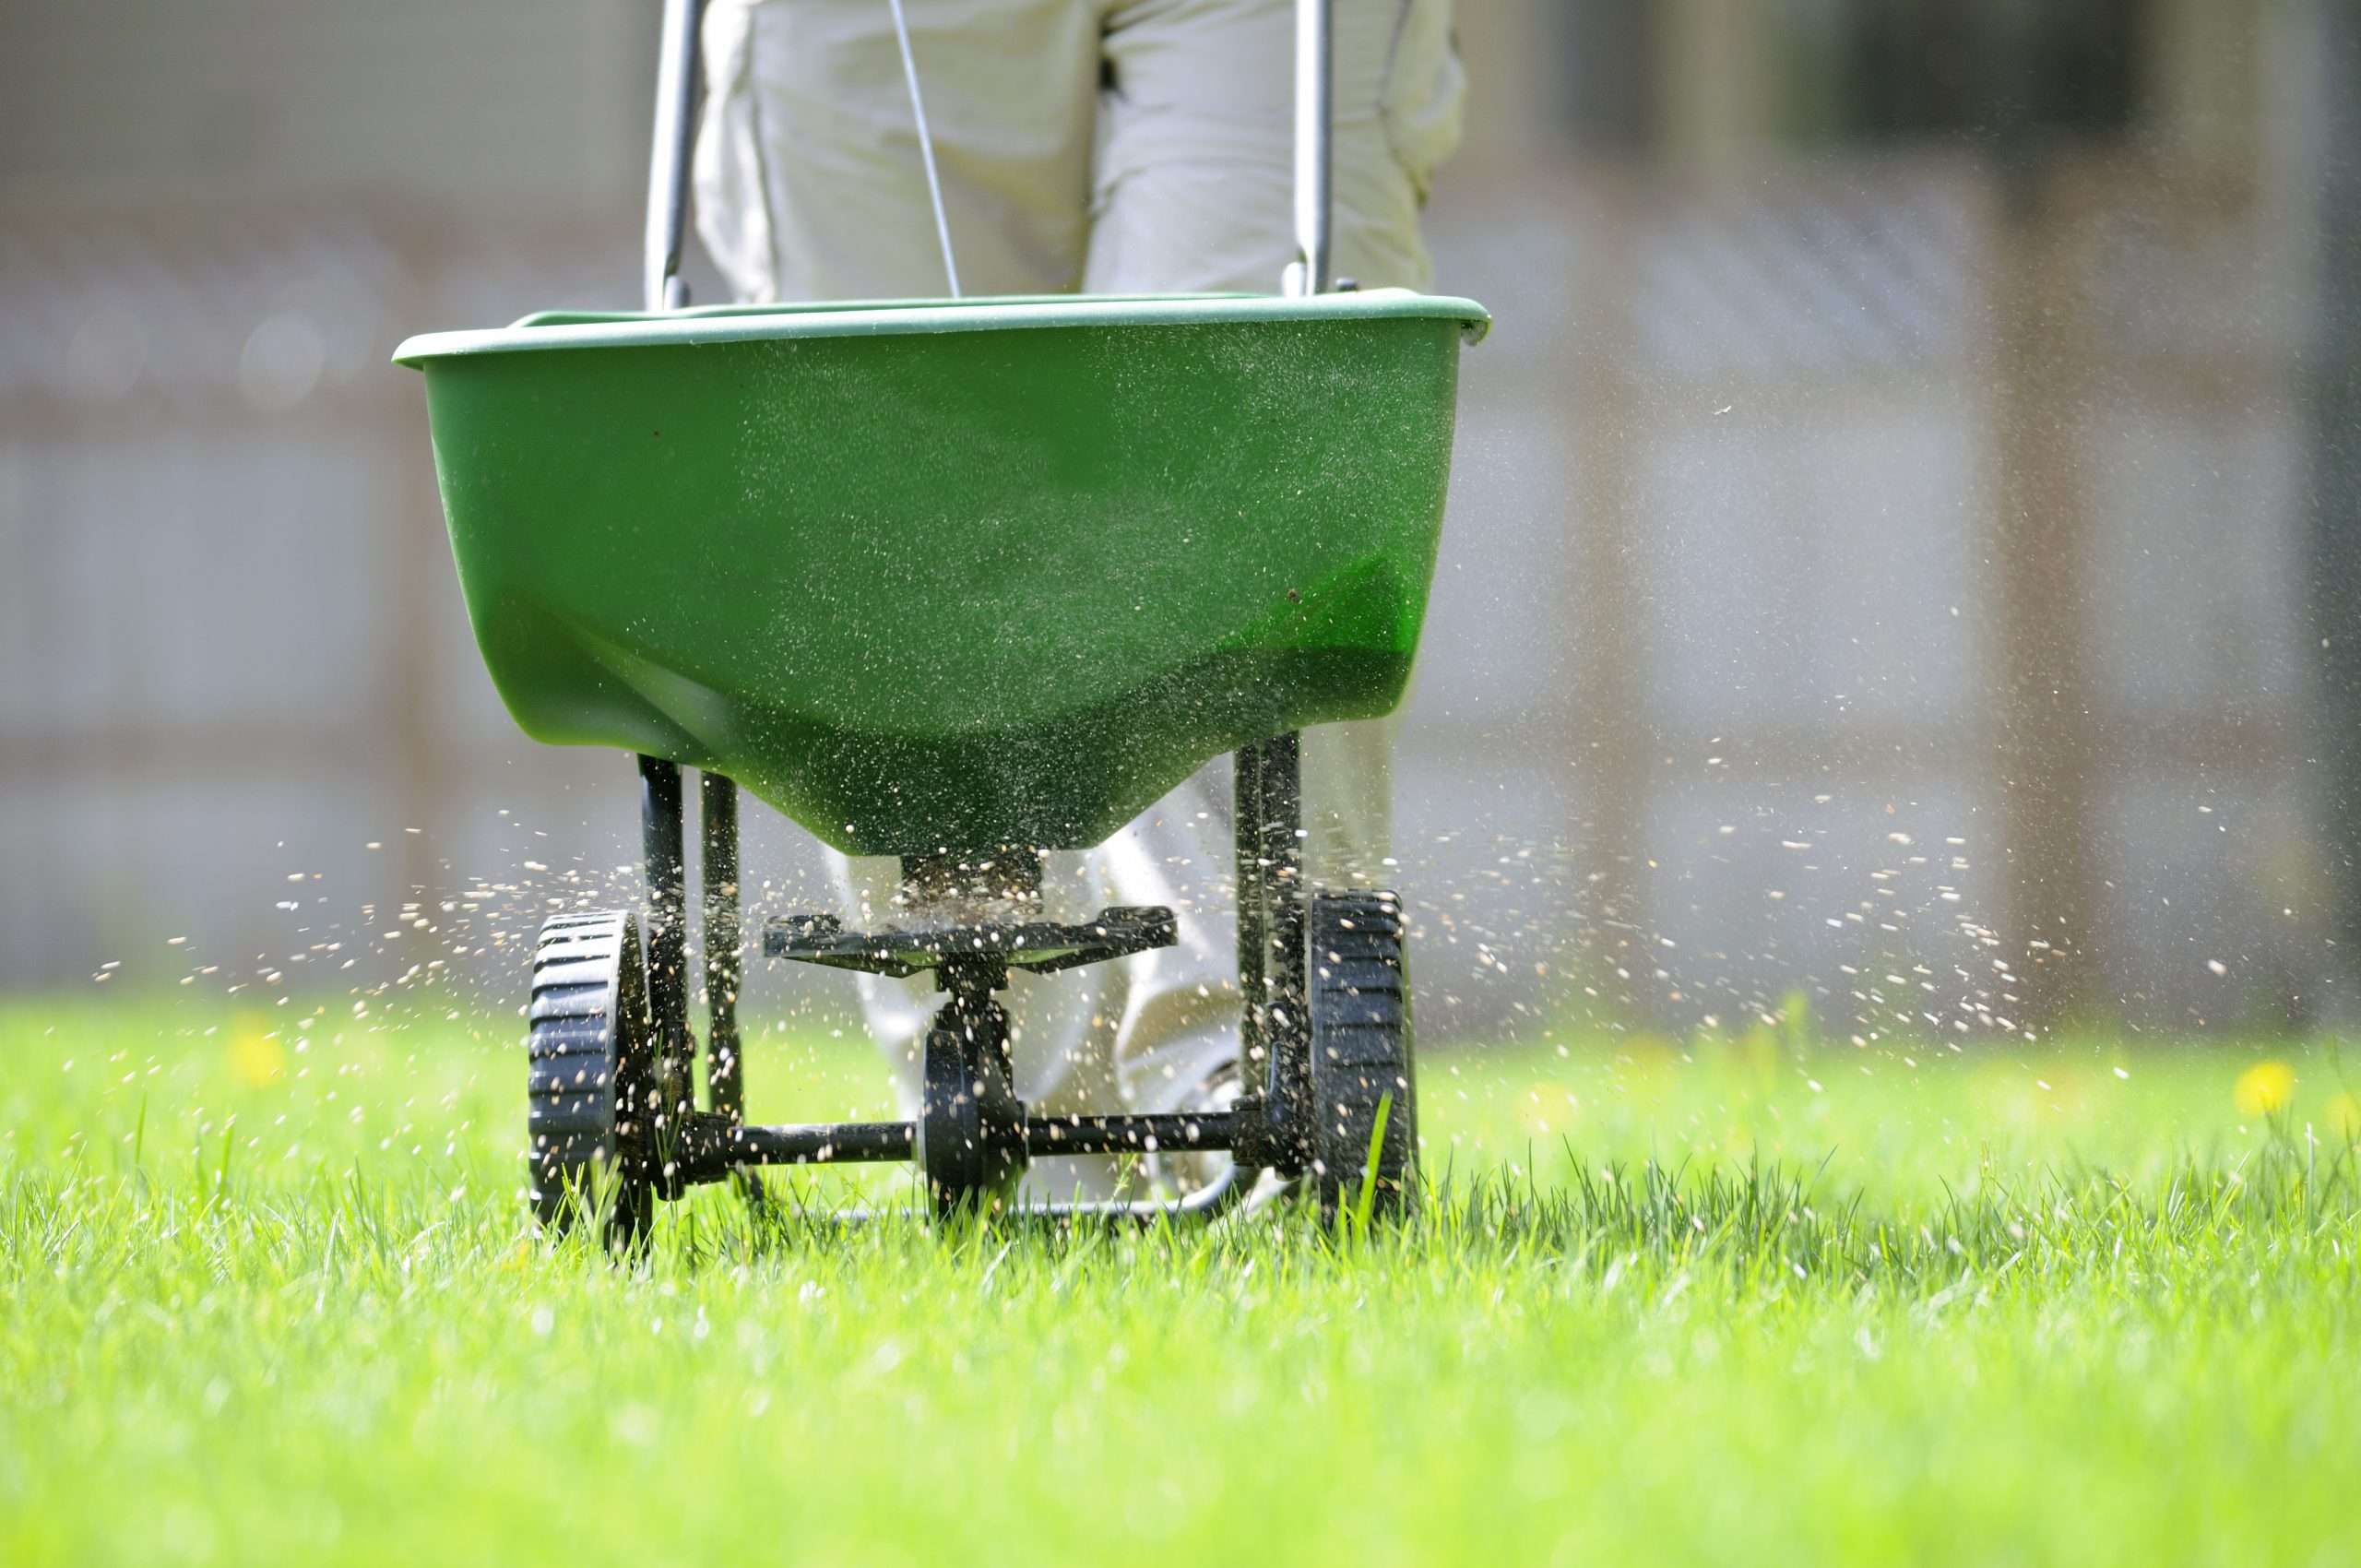
The only way to fix a bald spot is by planting grass. But before you do so, you need to dig up the damaged section and its surrounding. Once you’ve done that, add plant-based compost and starter fertilizer like 13-25-12. Now you can scatter some seeds, water the ground, and cover the section lightly with straw. You can also decide to use sod instead of seed grass as it solves the problem instantly.
Some products like, Mighty Fine Lawn Repair Mix, contain seed, mulch, fertilizer, and tackifier all in one product for an easy solution to patch a lawn.
Weeds On The Lawn
Weeds on the lawn are a problem that every homeowner has to deal with at one point—from crabgrass, creeping Charlie to dollarweed, dandelion, and oxalis. You can tell that you have weeds on your lawn by checking for any other plants other than grass.
Getting rid of weeds is a bit difficult as you have to be careful not to kill the grass. You can choose to use the hand weeding method if you have a few weeds on the lawn. You can also use gas-powered flamers to kill the weeds. If the above methods fail to work, use a high-quality herbicide like Crew from Corteva Agriscience or call a lawn care service to help you with the weeds.
White Grubs
White grubs are destructive pests as they feed on grass roots causing your lawn grass to brown and die. As the name suggests, white grubs are white in color and have a C-shape. You can tell whether your lawn is infested with white grubs by checking for yellow or brown patches during spring and fall.
You might also notice skunks and raccoons digging up your lawn as they look for white grubs. Once you notice these signs, dig up the affected spot and check for white grubs. The best way of killing white grubs is by applying a pesticide when they are most vulnerable, ideally during fall and spring.
Soil Delivery is Easy
5 Reasons: Soil Delivery is Easy!
Soil isn’t used only for creating new gardens. It can help to raise garden beds and provide material for landscaping projects. But these projects can use much more soil than expected, especially when it comes to making multiple garden plots. Getting your soil delivered is a massive timesaver that ensures you are spending your time and energy on your project, rather than sacrificing a day to lugging soil from a garden center.
Here are five reasons to prove why soil delivery is a must for outdoor projects.
1. Always Buy In Bulk
It’s no secret that soil is cheaper when purchased in bulk. Individual bags of soil will cost more than a bulk purchase. Usually, when buying enough soil to qualify for delivery, the soil is shoveled into the truck rather than loading individual bags. This extra saving can add up even when combined with the delivery fee.
Purchasing in bulk ensures you will have enough soil for your projects. You can measure the amount of soil needed, then purchase a little extra in case of any accidents or miscalculations. Then when you buy the soil, rather than counting out bags yourself and hoping you have loaded up the correct amount, the delivery service will guarantee that your exact amount of soil is delivered to your door.
You can transport a bulk amount of soil on your own, but the logistics can be difficult to figure out when all you want is to focus on your project. Soil delivery takes this difficulty out of the equation.
2. Skip the Transport Logistics
Transporting soil in bulk requires a truck for it to be loaded into, often a specialty vehicle to account for the quantity. Most people will not have ready access to this type of vehicle and rental is expensive. Instead of finding a truck rental company, obtaining a license or permit to drive this vehicle (if required by local laws), and then taking the time to load and haul the soil, ordering soil delivery is a quick and easy process. It takes away the risk of causing a road accident while driving a large, unfamiliar vehicle.
Individual bags of soil can be purchased in large amounts then loaded into a car. But even with a car big enough to hold the bags, the heavy weight can cause strain on the car itself, leading to extra maintenance down the road. It is also dirty, as even when bags do not rip open, they are prone to spilling dirt when transported.
3. Hauling Soil Is Hard Work
Moving the soil across your own land is difficult enough when it’s time to work on your project. Whether you’re lifting bags or shoveling the dirt yourself, loading up soil puts strain on your muscles. You’ll want to save this energy for your gardening, not burn out from just gathering the materials.
4. Choose Your Own Timeframe for Soil Delivery
Transporting soil on your own will set back your project. You will need to wait for the store to open, take the time loading the soil, drive back home, and then you’ll likely need a short break before getting to work. Even if done on a different day, the transport will take a decent chunk of your day which could have been spent on other things.
With soil delivery, you can choose an exact timeframe for soil to be delivered. No more will you need to wait for stores to open then plan for the trip. You can start your project at the beginning of the day, before the temperature rises. If you choose to have your soil delivered beforehand, it still saves the trip to the store.
5. Soil Delivery Is a Massive Timesaver Overall
Run out of soil? You can order more soil for delivery before needing to pause your project and risking running out of momentum. Is the store far away, or do you need to plan for obtaining the right vehicle to haul soil? Delivery removes these factors, and you only need to focus on choosing the right time for the product to arrive at your doorstep.
Getting the soil from the store to your home is stressful and time-consuming, thus delivery should be considered as one of the best options to skip this hassle. Do your soil research in advance, decide on the best selection from the comfort of your own home, then order soil for delivery without ever needing to get your hands dirty before the fun part begins. Saving time and money at the same time is one of the best decisions you can make for yourself.
Sources
“2021 Topsoil, Sand & Fill Dirt Delivery Costs (Prices Per Yard).” HomeGuide
Larum, Darcy. “Raised Bed Soil Depth: How Much Soil Goes In A Raised Bed.” StackPath, 20 July 2020
“Learn How Much It Costs to Deliver Soil, Mulch or Rocks.” HomeAdvisor, 5 May 2021
Mulch Mold: Harmless but alarming!
Mulch Mold: Harmless but alarming!
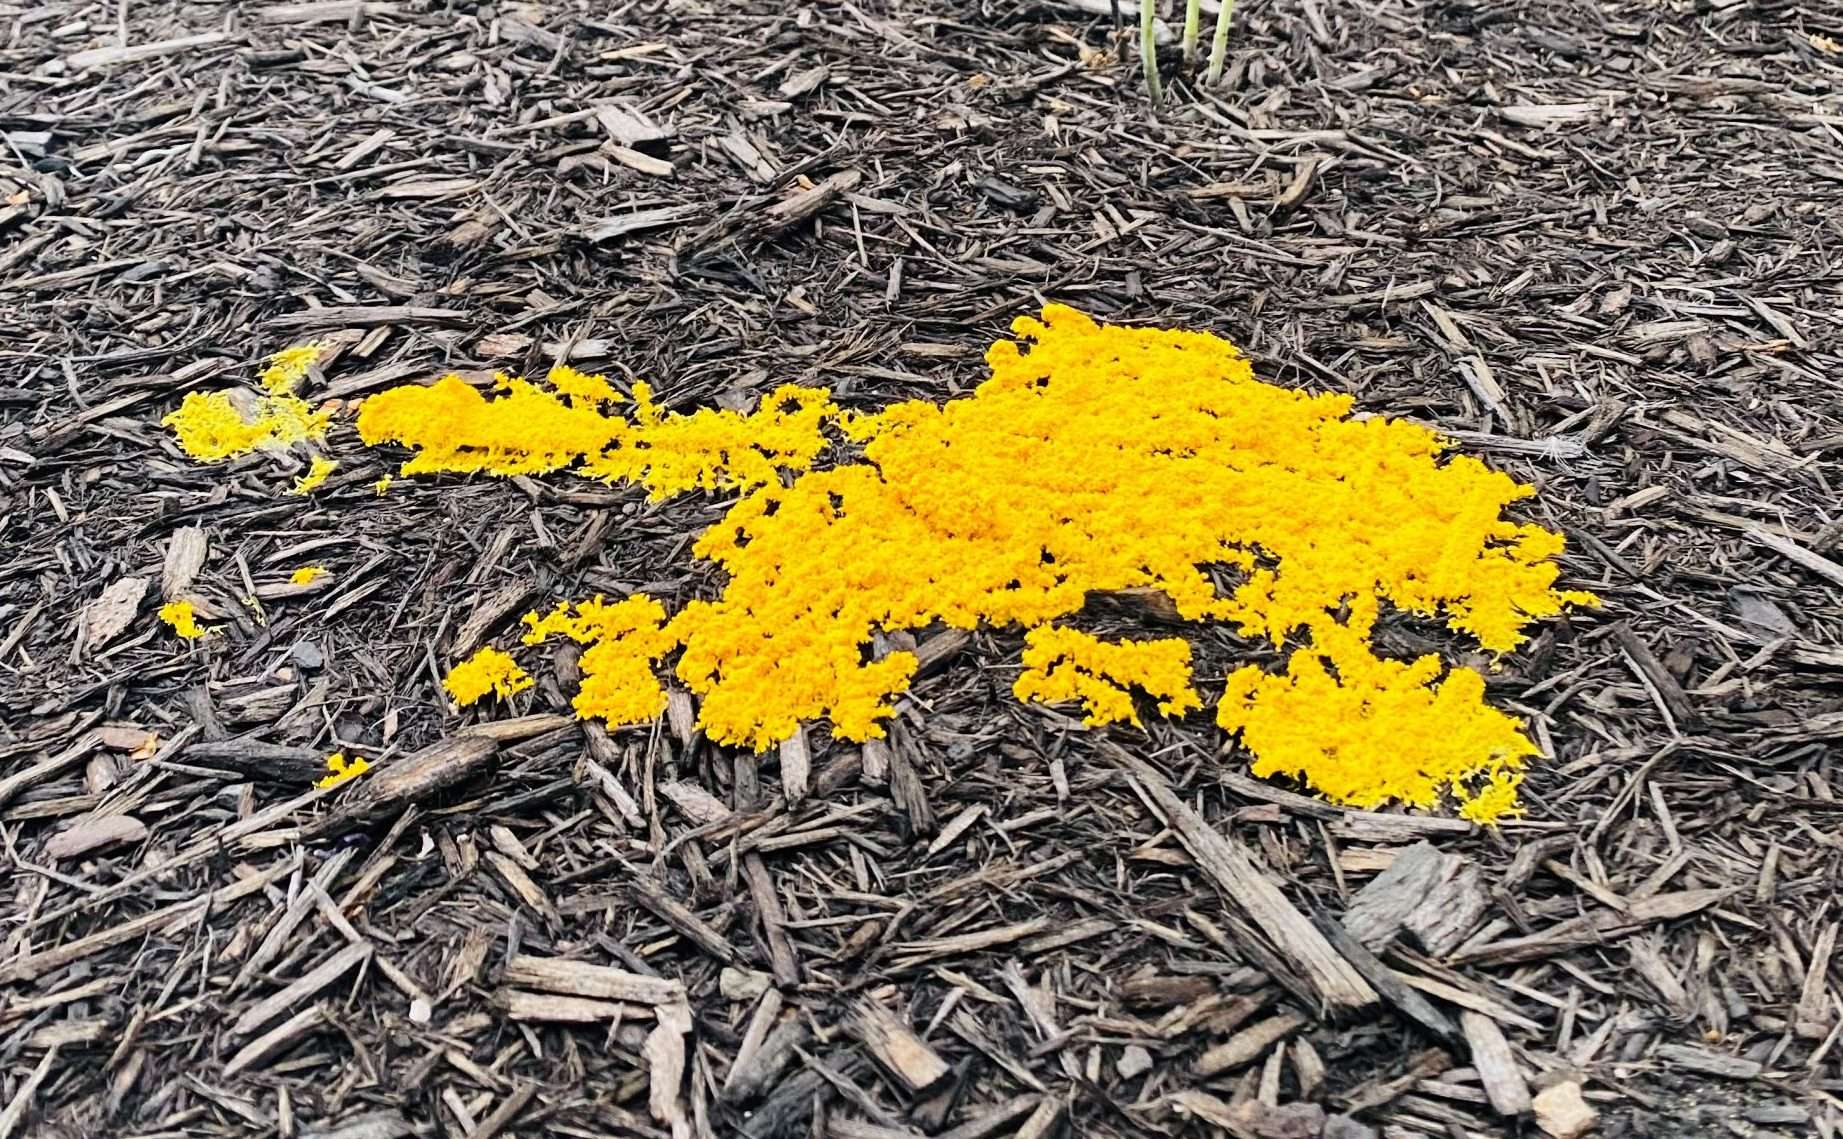
Mulch mold — It’s certainly not our favorite topic to cover in the garden, but it can be quite alarming to come home to the clump of slime on your fresh bark mulch! It may appear in a range of colors and textures throughout the year and the good news—it’s usually harmless.
Where did it come from?
Like many things in your garden, plasmodial slime molds spread via organism and wind! The mass has no brain, but can move about to find bacterial nutrients to feed on for the time being. It did not come from any plant disease, or the mulch it hovers on.
Why do I have it?
Slime molds thrive in wet conditions, and mulch is designed to hold moisture. You have organic matter mixed with moisture to thank! In rainy seasons or after a large amount of rainfall, you are the most likely to find the unpleasant guest, sometimes in several places, around your garden.
How can I get rid of it?
The presence of slime mold is NOT a cause for concern. It usually does not damage any plants. If you find it unsightly, you can simply scoop up and dispose of it. Rake the space to release some of the moisture in the mulch and the problem should take care of itself. As the weather dries up, so does slime mold- in a few days it will be gone.
There are a couple preventative measures you can take including regularly raking your mulch during periods of great humidity. We do not suggest treating your landscaping with any chemicals to combat the formation of natural mulch mold.

Mulch Delivery Tips
Check Out Our Top Five Mulch Delivery Tips
Mulching your landscape can seem like a simple exercise. After all, all you need to do is shovel, dump, and spread, right? Well, that’s not entirely true. There is a bit more that needs to be done if you are to get it right. The good thing is if you put a little more thought and sweat into it, you can end up with a beautiful landscape and healthy plants. Let’s look at some tips that will help you to properly lay your mulch.
Calculate How Much Mulch You Need First.
This is the first step. Before you get some mulch, you need to know how much is needed. You don’t want to end up with too much or too little. So how exactly can you figure out how much mulch is needed for your landscape?
You need to figure out the total square footage of the area you are working with. To do this, use your steps. The average step is about 2.5 feet long. You can therefore count the number of steps to measure the width and length, then multiply the two to get your square footage.
Consider the example below:
Length – 10 steps ( x 2.5)
Width – 15 steps (2.5)
Square footage – 25 feet x 37.5 feet = 937.5 square feet
Now that you have your total area, you can then figure out how many bags of mulch to buy. Mulch is sold in cubic yards and one cubic yard covers about 324-square-foot of ground.
That’s if you want to achieve about 2-inch layer thickness.
If the math isn’t your thing, check out our mulch calculator.
Get The Timing Right
You can either lay mulch in spring or the fall. Several advantages come with laying down mulch in the spring. One being that the seasonal rains will help break down the organic materials in the mulch and these materials will get into the soil. This will help give your landscape a fresh look over the entire course of spring and summer. However, if you lay mulch in the fall, it can provide a much-needed layer of insulation for your plants and shield them throughout the colder months.
Regardless of when you apply your mulch, it’s best to do it when the ground is moist and thawed so that the mulch you add will help lock in the moisture.
Get The Best Tools
Ready to get your hands dirty? Now that you have the correct amount of mulch, and you know when to do it, let’s look at how you can get the actual job done.
- Shovel
- Wheelbarrow
- Rake
- Gloves
Prepare Your Ground Properly
After you gather all the necessary tools, clean out your beds. Ensure that you do away with all the weeds, sticks, dried leaves, and old mulch. You should also redo the edging along your beds. When the beds are clean and ready, water them. If you have received no rain and the ground is dry, you’ll want to add some moisture. One advantage of mulch is that it suppresses weed growth. You might also want to add some herbicides just to make sure.
Use The Proper Thickness
You can now start spreading your mulch. Shovel mulch from the wheelbarrow or empty the bags onto the ground, creating small heaps. You can then use your hands and the rake to spread it all over. The best thickness is about two to four inches thick. If you apply a very thin layer of mulch, weeds can push through and grow. If the thickness is too much, you might also end up with water not being able to go through and reach the soil. After you have spread everything evenly, you can water the ground again. This is not mandatory, but it can help to settle the mulch properly.
Mulching large pieces of land is easy. When you are dealing with gardens, wait until your plants are growing to avoid burying them and suppressing their growth. Also, ensure that you keep mulch at least three inches from the base of plants and trunks of trees. Avoid mulch volcanoes! Mulching your grounds this spring will give you healthier soil, fewer weeds, and improved water retention throughout the growing season.
Best Practices: Mulch
Best Practices: Mulch!
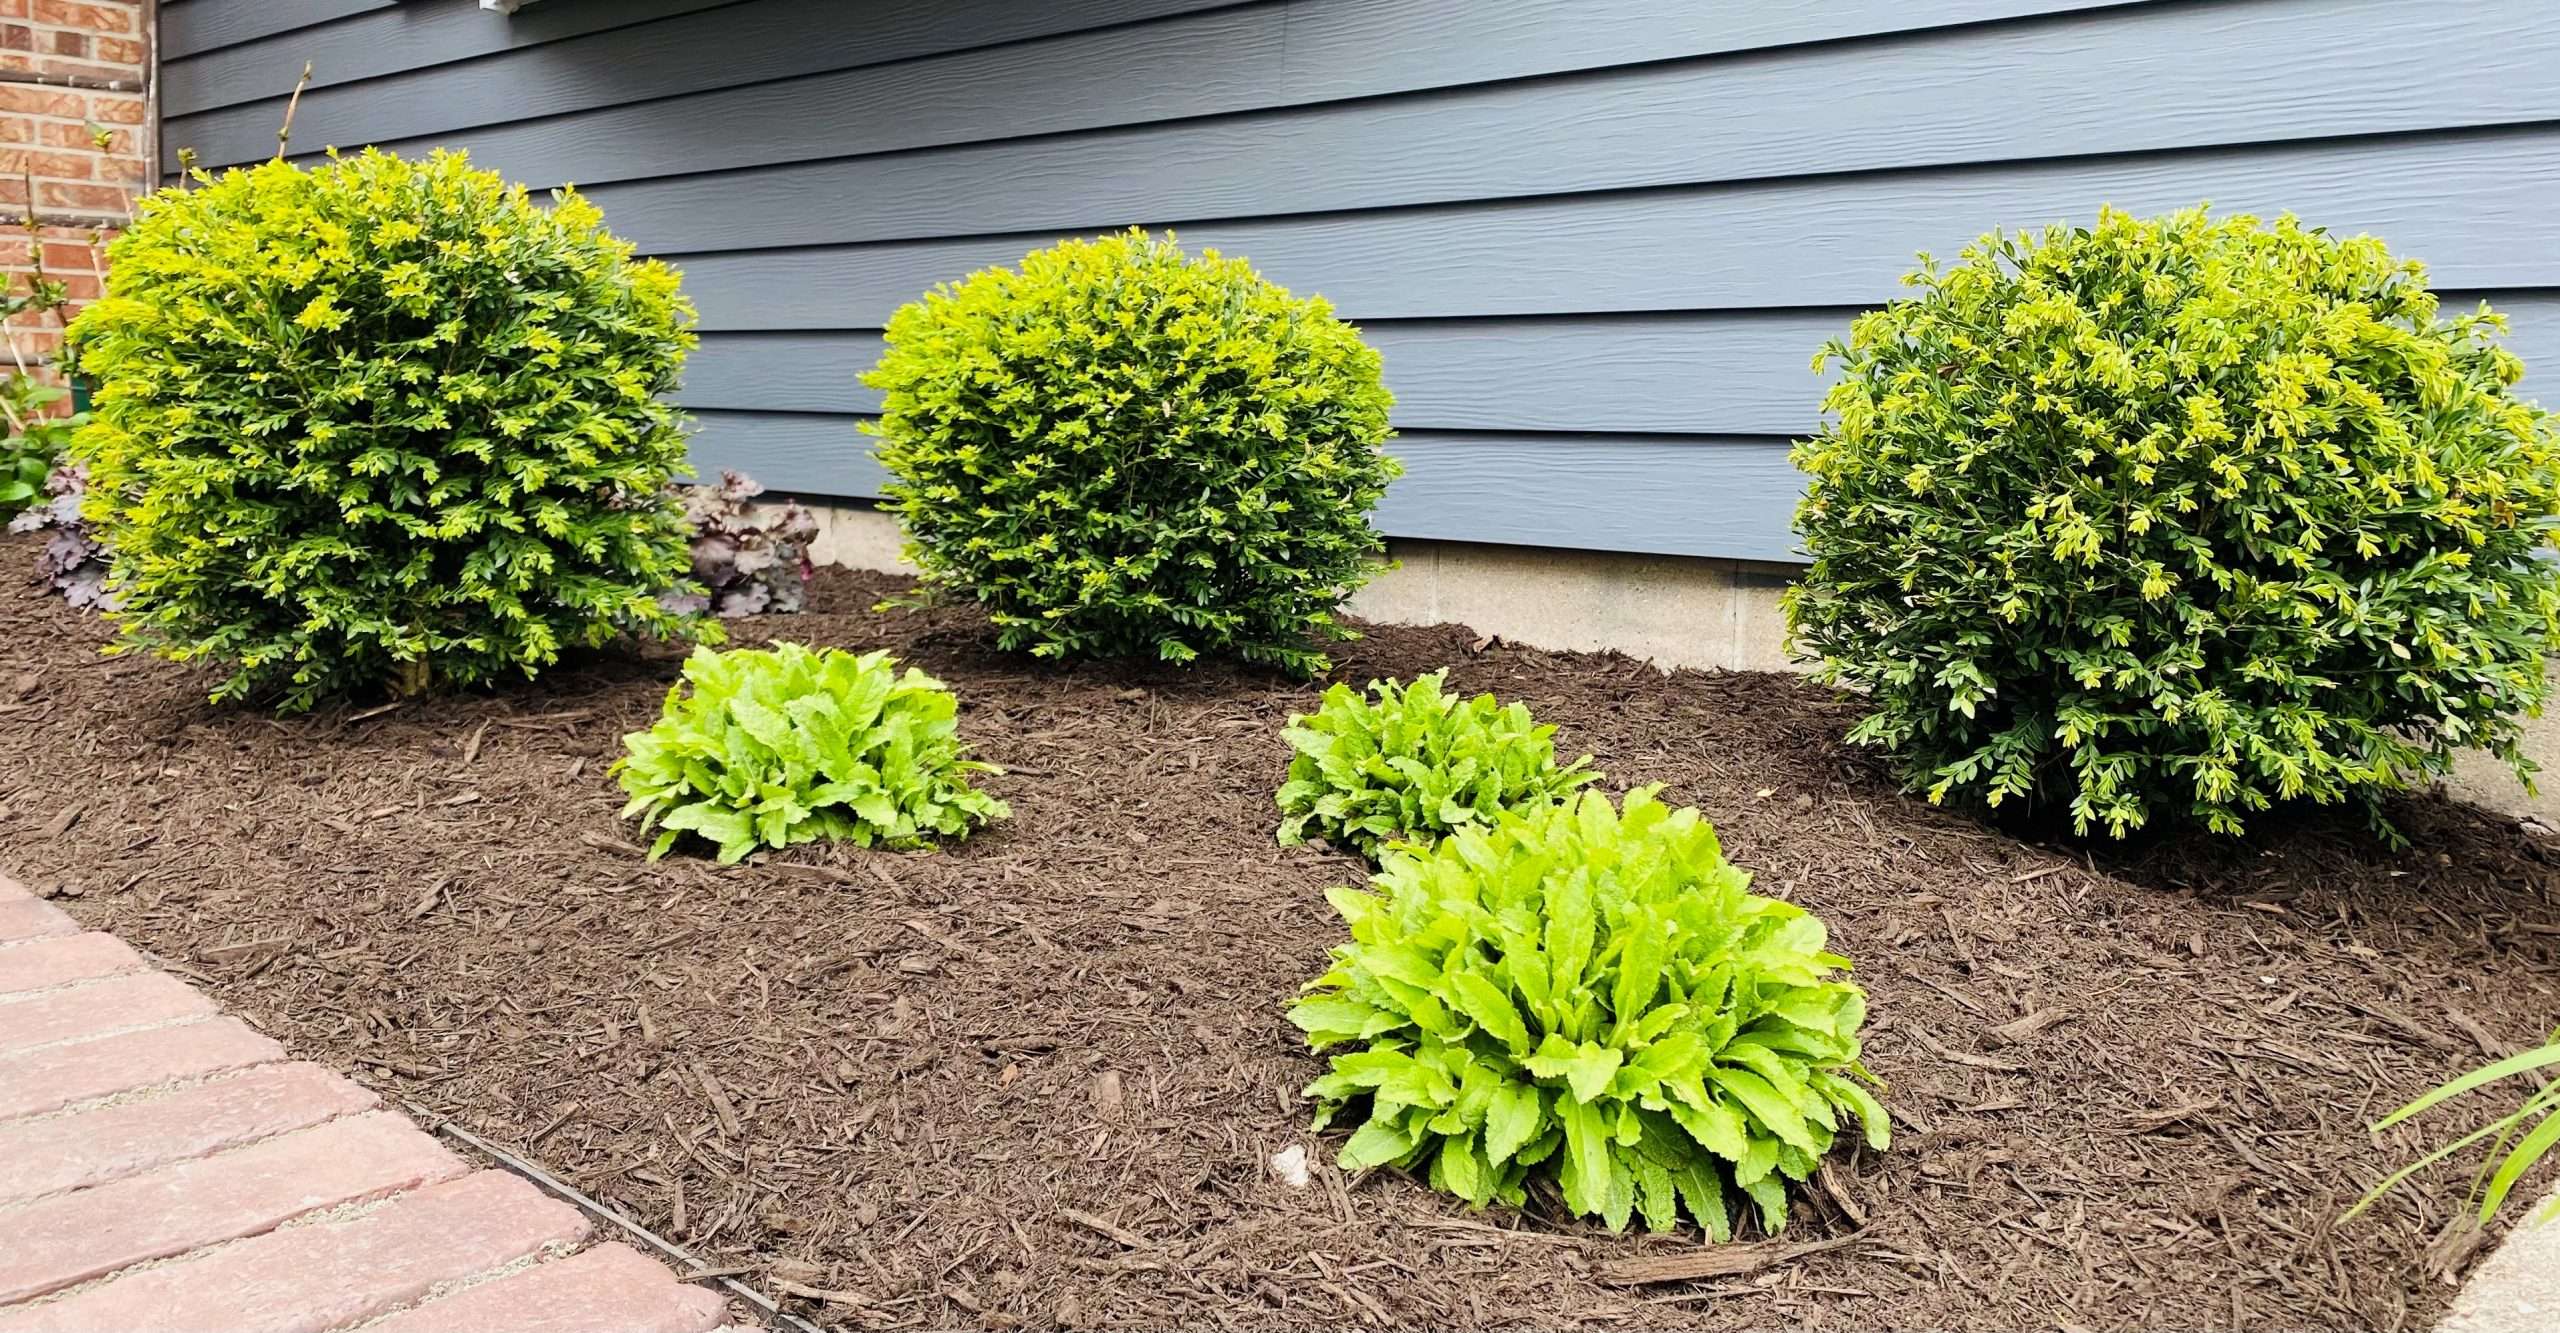
There are a number of advantages to adding mulch to your landscape. When mulch hardwood bark mulch is applied and cared for correctly, it prevents erosion, protects plants from extreme temperatures, improves soil structure by adding organic matter, conserves soil moisture, suppresses weeds, and adds beauty to landscape plantings!
Before
- Kill weeds: spray all weeds with weed killer 1-2 weeks prior to mulching. This allows them to completely die, making them much easier to pull when you are ready to get to work.
- Trim trees and bushes: Because of the debris produced, be sure to trim trees and bushes before applying your new mulch.
- Clean out mulch beds: remove all dead leaves, weeds, trimmings, and wood build up with a rake.
- Cultivate: Use a roto-tiller or hand cultivator to loosen any compacted soil or mulch. This allows moisture and air to pass through the mulch easier.
- Edge your beds: Landscapes with clean edges enhance the appearance and give a professional look. Use an edging shovel or power edger to accomplish this. Tip: Use your garden hose as a guide to create nice, flowing curves!
- Rake Smooth: Use a stiff rake, such as a mud rake, to smooth all surfaces to be mulched. Otherwise, your mulch may look lumpy.
- Apply a pre-emergent: This is the time to prevent weed seeds! Apply the pre-emergent before mulching. A second application later further ensures protection from weed seeds. Always read the product directions before application.
During
- It’s time to mulch: Using your hands or a rake, apply new mulch over the cultivated mulch or soil. Spread evenly approx. 3 inches thick.
- Say no to mulch volcanoes: Mulch volcanoes occur when mulch is piled around the trunk of a tree or shrub. These are detrimental to the health of the plant by encouraging disease and decay, and preventing proper root development.
After
- Mulch Maintenance: After a month or so, check the mulch for compaction. If its compacted, use a garden claw or cultivator to loosen it. This allows for air and water to pass through, which helps prevent the growth of fungus and restores a fresh appearance.
- In the event of fungus: Remove it and the surrounding mulch. Rake existing mulch to cover the area. Fungus is a sure sign of too much moisture in a compacted area.
Recycling Organic Materials
The Ins and Outs of Recycling Organic Materials
Recycling is not just applicable to aluminum cans, glass, or plastic. Your organic waste can also be recycled. Why is this important, and how does it benefit you?
Well, the first thing to know is that organic materials currently take up a large chunk of space in many landfills. That means landfills are filling up faster and faster, and more land is being used up for trash disposal. Additionally, organic materials release methane which is a not-so-good greenhouse gas.
Therefore, organics recycling through composting is important because it:
- Produces high-quality compost that can be used to enrich the soil, so that it retains moisture and has more nutrients.
- Supports gardening and farming initiatives by improving crop yield, helping plants to grow healthy, and boosting the production of soil organisms that improve soil quality.
- Reduces excessive reliance on chemical fertilizers and pesticides
- Lowers your carbon footprint since it reduces the methane emissions that would otherwise be produced if the organic material had gone to a landfill.
With these and more benefits, recycling organics for compost is something all American households should participate in to avoid being part of the problem. After all, everyone is guilty of throwing away edible food regularly.
What sort of organic materials can you recycle?
Typically, you can recycle food and green waste such as:
- Old mulch
- Dirt
- Leaves
- Grass clippings
- Hay and straw
- Sawdust
- Wood chips
- Fruits and vegetable
- Eggshells
- Nutshells
What not to compost
Materials that are not suitable for organics recycling include:
- Garbage and food scraps – these cause odor problems and attract pests and rodents.
- Concrete, plastic, and metal – these are not classified as organic waste.
- Treated timber – the chemical pesticide might kill beneficial soil organisms.
If you’re dropping off your organics at your local composting facility, be sure to note which materials are acceptable for dumping.
Using a registered composting facility
You can separate your organic waste from other types of waste produced in your home or at your business premises. Your local recycling authority will then collect it at your curb and transport it to a centralized recycling facility.
Some composting facilities require that you pay a dump fee if you want to deliver and offload the organic waste at their site.
Home composting
You can create a compost pile in your backyard or indoors. If it’s outdoors, it’s recommended that you start the compost on bare earth to allow beneficial organisms to be part of the mix. You must add twigs or straw first to facilitate good drainage.
Then comes the layering process where you alternate between moist and dry materials. Remember to cover your compost pile with a tarp to prevent moisture loss. A well-kept compost should be free of odors and must not attract rodents or pests. It may take several weeks or months until your compost is ready for use.
The bottom line
Recycling organic materials is a simple and cheap way of giving back to the environment. It also creates an essential landscaping ingredient that can enrich your soil or lawn.
Overall, the benefits of organics recycling are clear and it’s not surprising that it’s increasingly becoming popular. You too can start recycling your organic waste now that you know how it works.

Outdoor Renovations
Outdoor Renovations
A new outdoor living space can add functional square footage to your existing home by providing a new space to relax and entertain. Consider how you intend to use the space- outdoor kitchens, bars, fire places, fire pits are all great ways to utilize outdoor living areas. Be sure to extend the decorating style from your home! A small project can go a long way to maximize your space, curb appeal, and time spent outdoors.
Added features make your outdoor living area an investment you can enjoy any time of day or year. Lighting adds an inviting visual dimension in the evening even from inside your home. Fire features can create the kind of warmth to keep you outdoors, enjoying your outdoor space in cooler temperatures.
The American Society of Landscape Architects recommends the homeowners budget at least 5-10% of your home’s worth for proper landscaping and hardscape projects. With the right contractors and materials, this investment will increase the value of your home. A simple walkway and front porch renovation will improve your curb appeal and greet your guests with style- be sure to select colors and textures that will be complementary in terms of color and texture.
There are so many inspiring resources online, from DIY design software to google searches and blogs just like this. Many professionals in the landscape industry will also have literature available to demonstrate the latest trends in outdoor living from brands like Proven Winners and Unilock. We have even linked a few of them below to spark your imagination.
Proven Winners
Explained: Soil Terms
Explained: Soil Terms
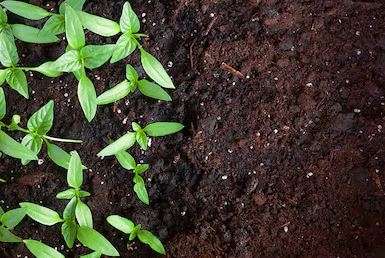
A wonderfully designed garden, lawn, or flower bed will lose its beauty quickly if the grass and plants aren’t receiving proper nutrients. Our company puts great thought into the types of soil we use for each project, and each situation may require a custom solution. Keep reading to learn more about the most common types of soil we use for our customers and why they’re most effective for different types of projects.
What is Soil?
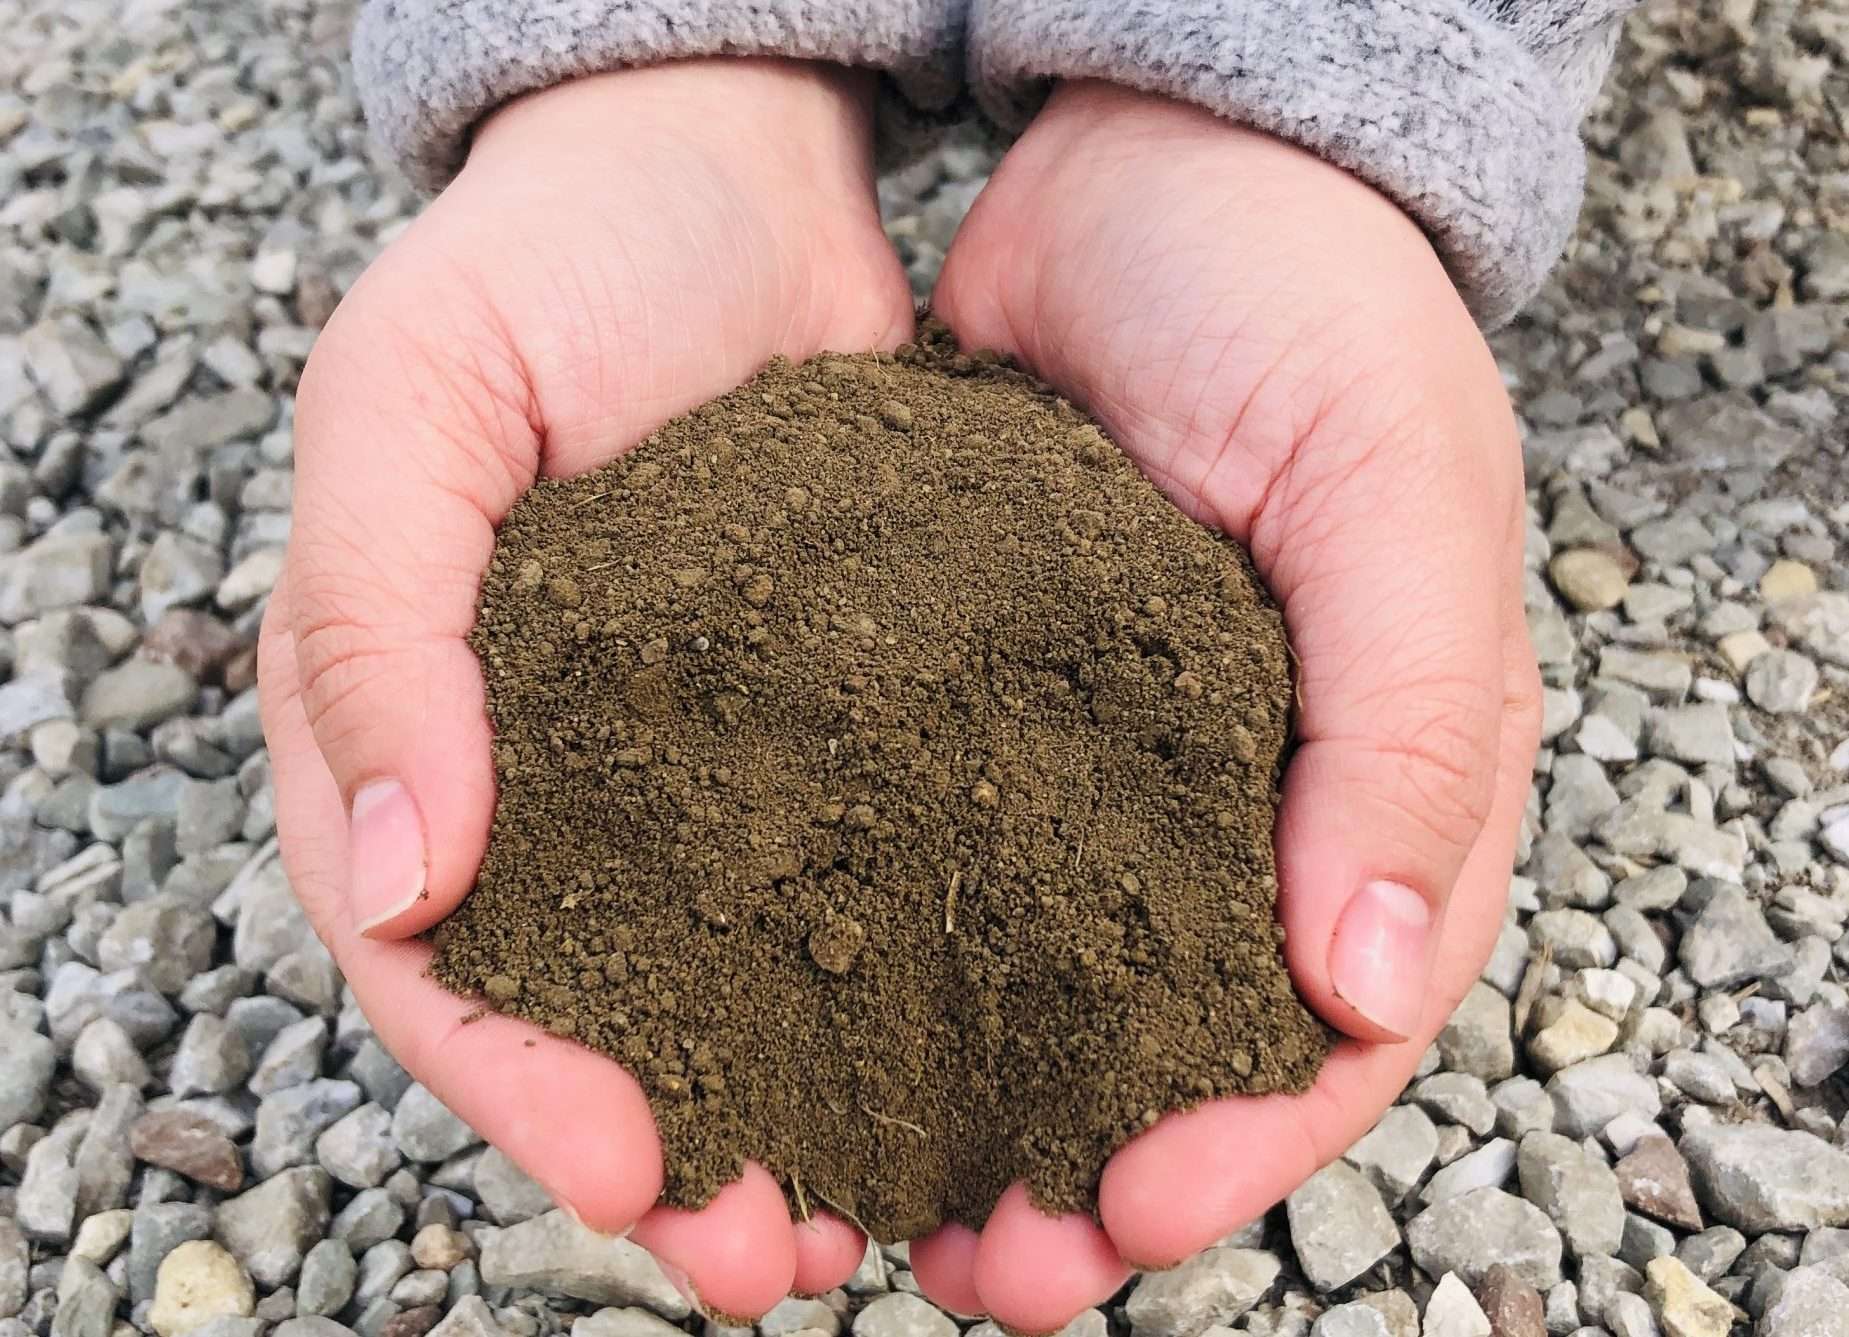
Soil is made up of minerals, rock, organic material, gas, and water, all of which create an ideal environment for plants to grow and thrive. There are three different types of soil: sand, clay, and silt. Sand is made up of large particles and has poor water retention. Clay is dense and made of very fine particles, which retains water well, but takes longer to dry. Silt is made up of both large and fine particles and is typically rich in nutrients and minerals.
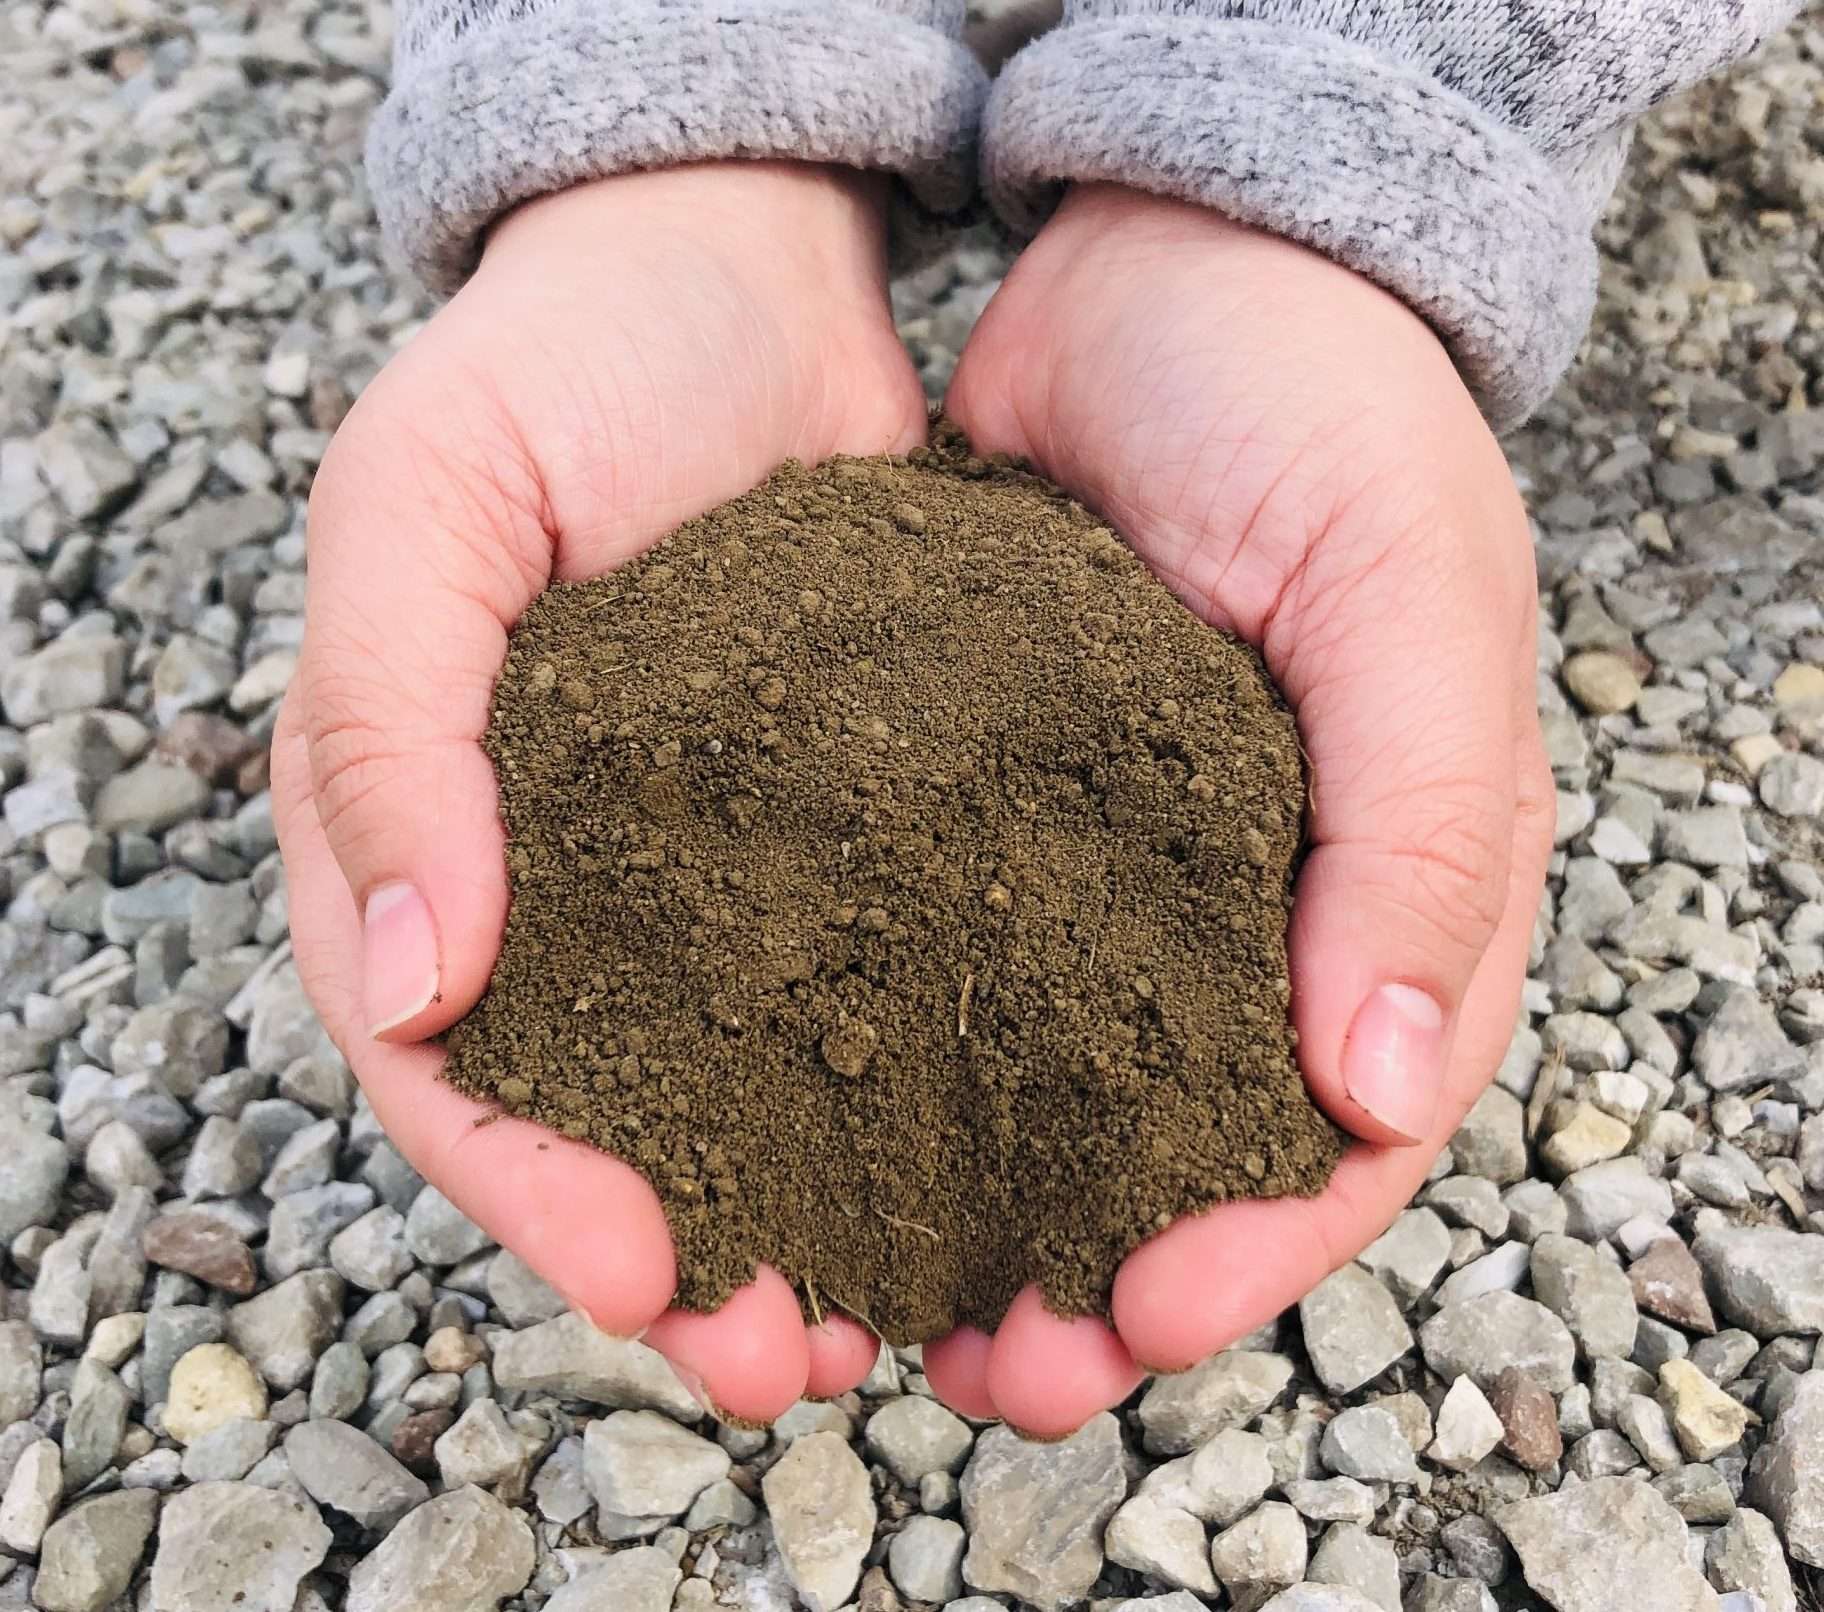
Topsoil is made up of healthy nutrients taken from the top layer of soil and contains organic matter that effectively holds moisture and creates a microbial-rich environment for proper plant growth. Pulverized topsoil is run through a large grinder to make it lightweight and easy to maneuver. This method also removes most debris, such as sticks, rocks, sand, and to ensure that the topsoil is of good quality.
Pulverized topsoil is best for walkways, patios, or filling in holes in lawns. However, it’s not a good idea to use in gardens or flower beds, because it becomes mushy and dense when it gets wet.
Compost is a mixture of decomposing nutrient-rich soil that is made up of organic matter, such as oxygen, bacteria, water, and other materials like food products, lawn clippings, and dry leaves. The materials break down and the rich soil is then used to refresh depleted soil in the springtime when it’s time to plant new crops. Compost has a very high nutrient content, and the nutrients provide a slow-release, creating an ideal environment for new plants.
Compost is great for many different uses, mixing it into the soil to improve nutrient quality, and spreading it directly into an aerated lawn. Many people use it to mix into the soil in gardens because many different types of fruits, vegetables, and plants benefit from the nutrient density in compost.
Bad soil can create a range of different problems for people trying to keep their gardens or lawns lush and green. You can be dealing with hard pan or compacted soil, soil with a high amount of clay or sand, dead or malnourished soil, or even soil with a high or low PH. Soil conditioner is added to soil to improve the soil’s structure by increasing water retention, aeration, and nutrients, and balancing the PH levels.
Unlike fertilizers, which also add nutrients to the soil, soil conditioners can actually change the structure of the soil. For example, if you’re dealing with clay or compacted soil, the nutrients from fertilizer will get stuck and not properly nourish plants. Before purchasing fertilizer, it’s best to do a soil test to find out the root of the problem, use a soil conditioner to correct the issue, and then move forward with a proper fertilization program.
If you have any questions about the different types of soil we use, we welcome you to reach out to us and ask questions!
Mulch To Protect In The Fall
Mulch To Protect In The Fall
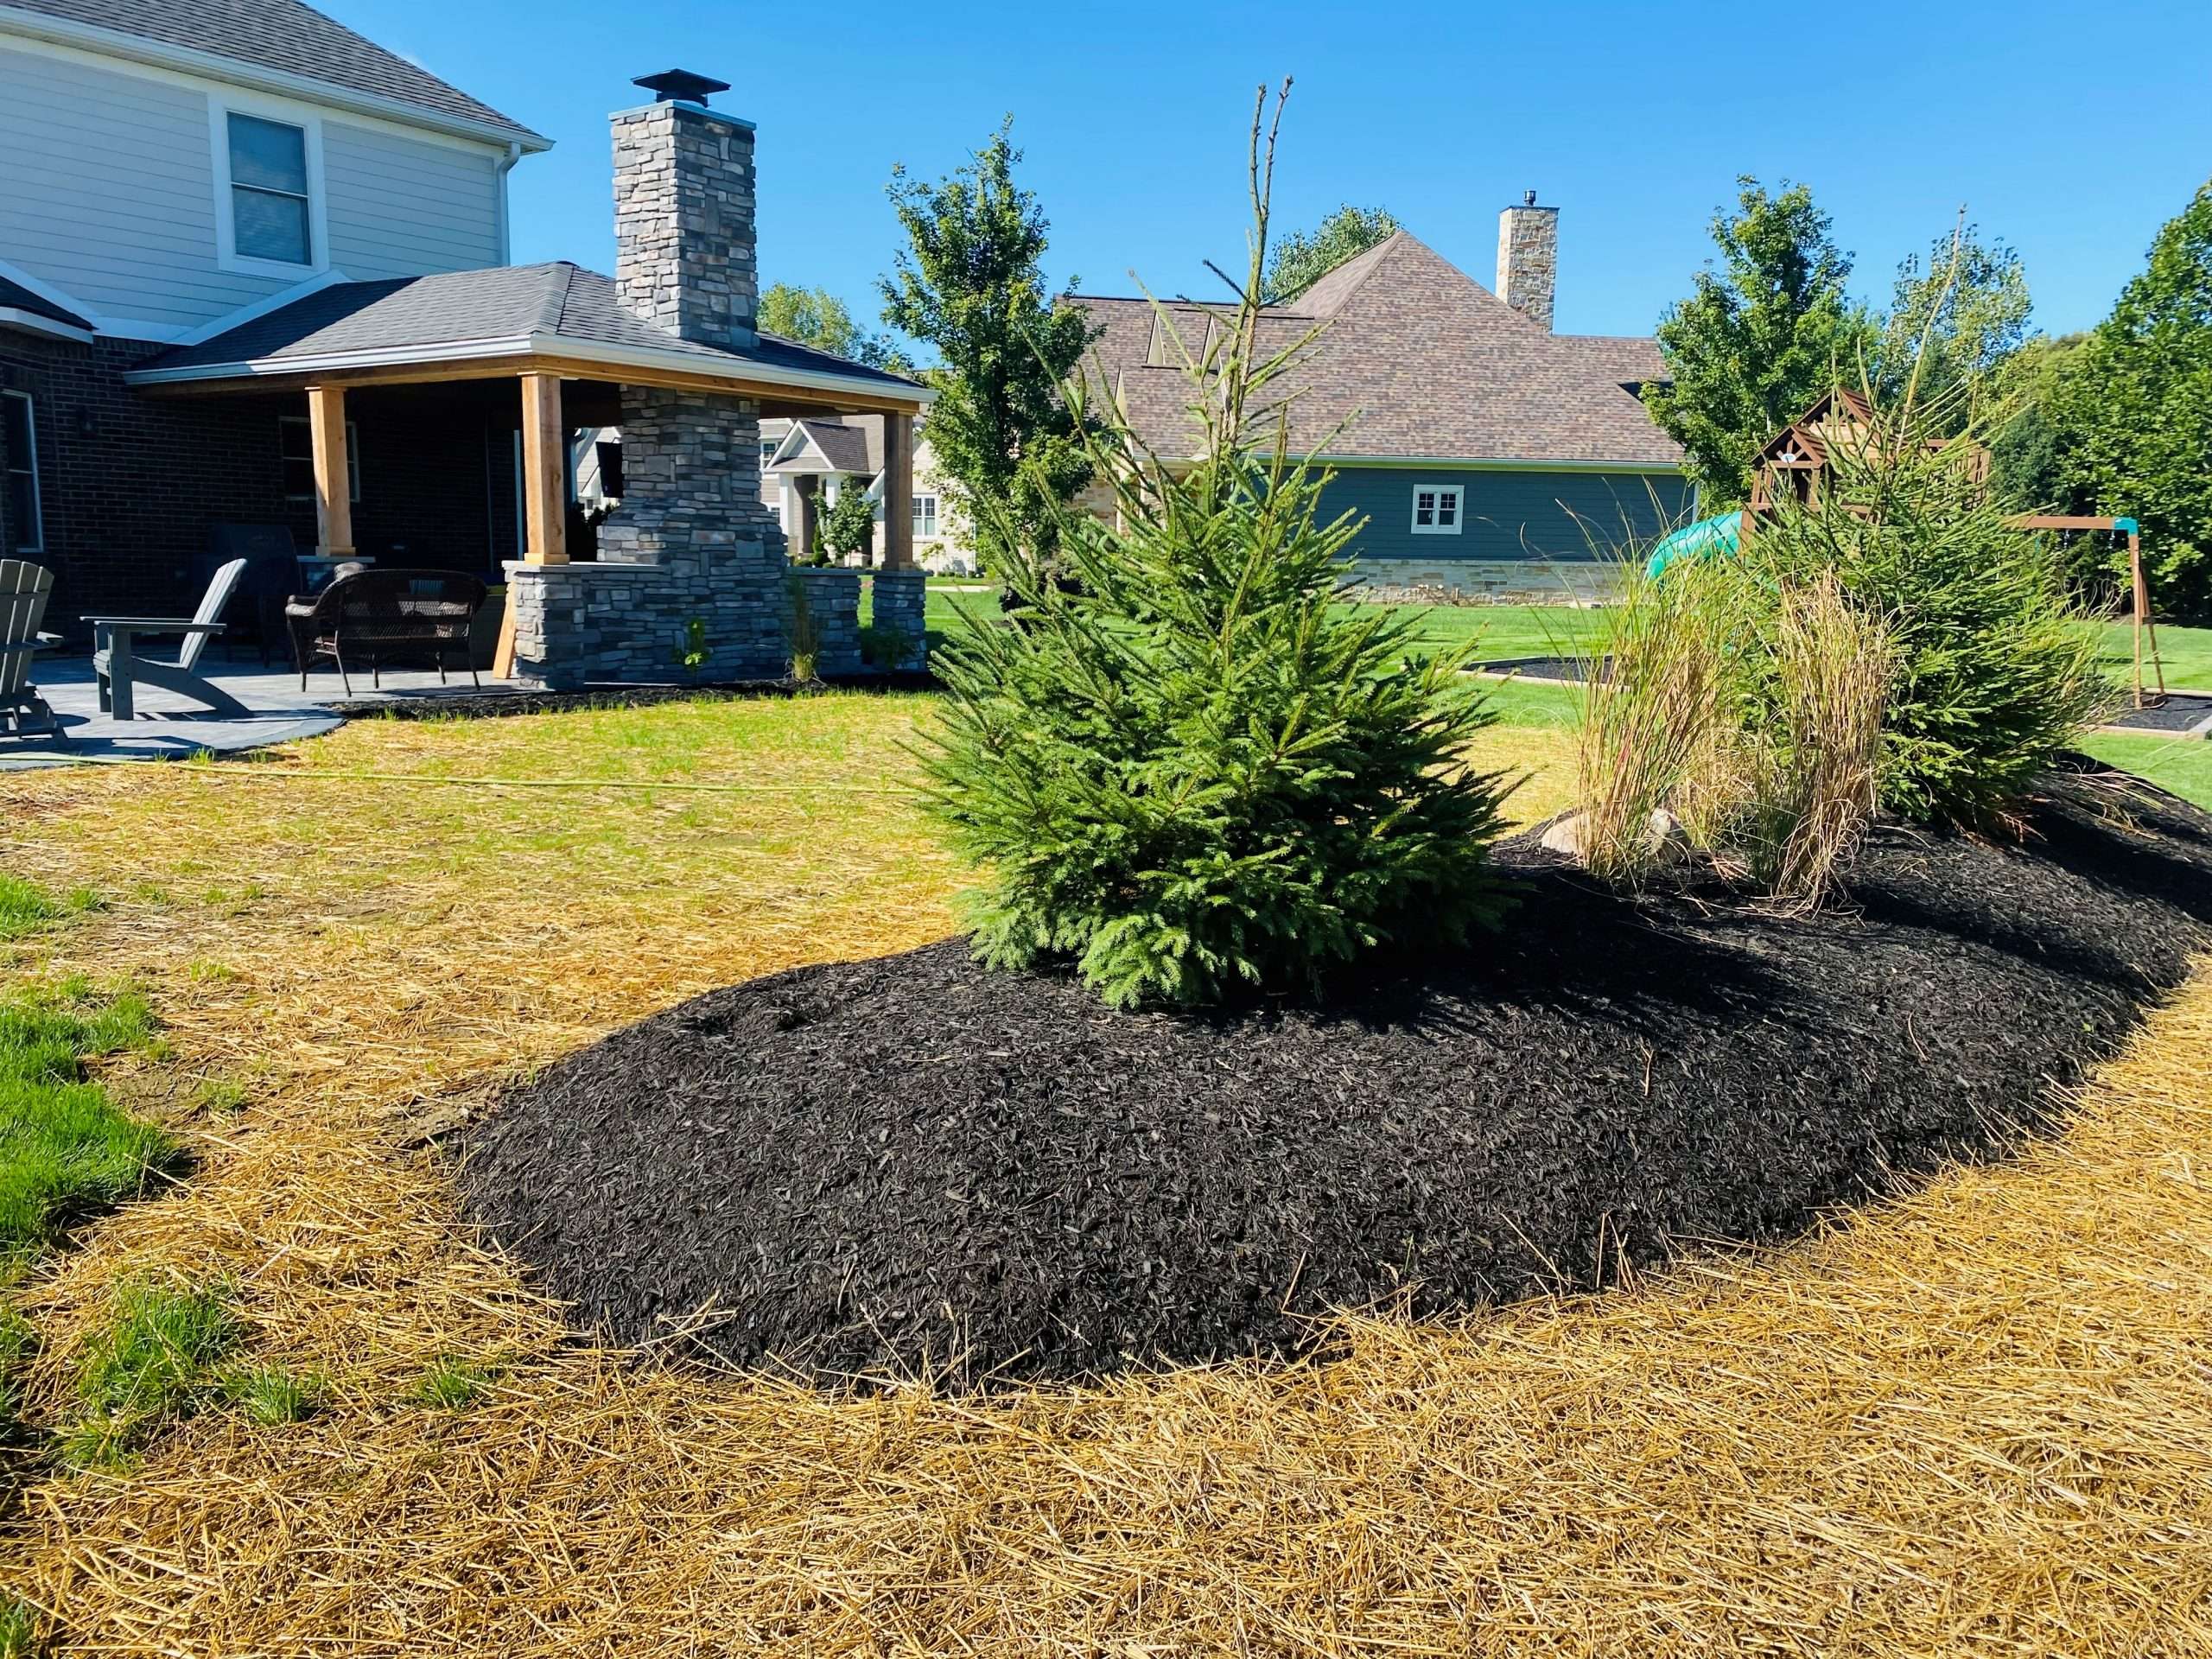
The need to mulch your landscape in the fall largely depends on climate. Here in central Indiana specifically, we are no stranger to extreme swings in temperate and freeze and thaw cycles (you’ve seen the potholes!). Mulching around plants, especially precious perennials in autumn protects against these changes in temperature and precipitation, prevents erosion, and enriches your soil throughout the winter months.
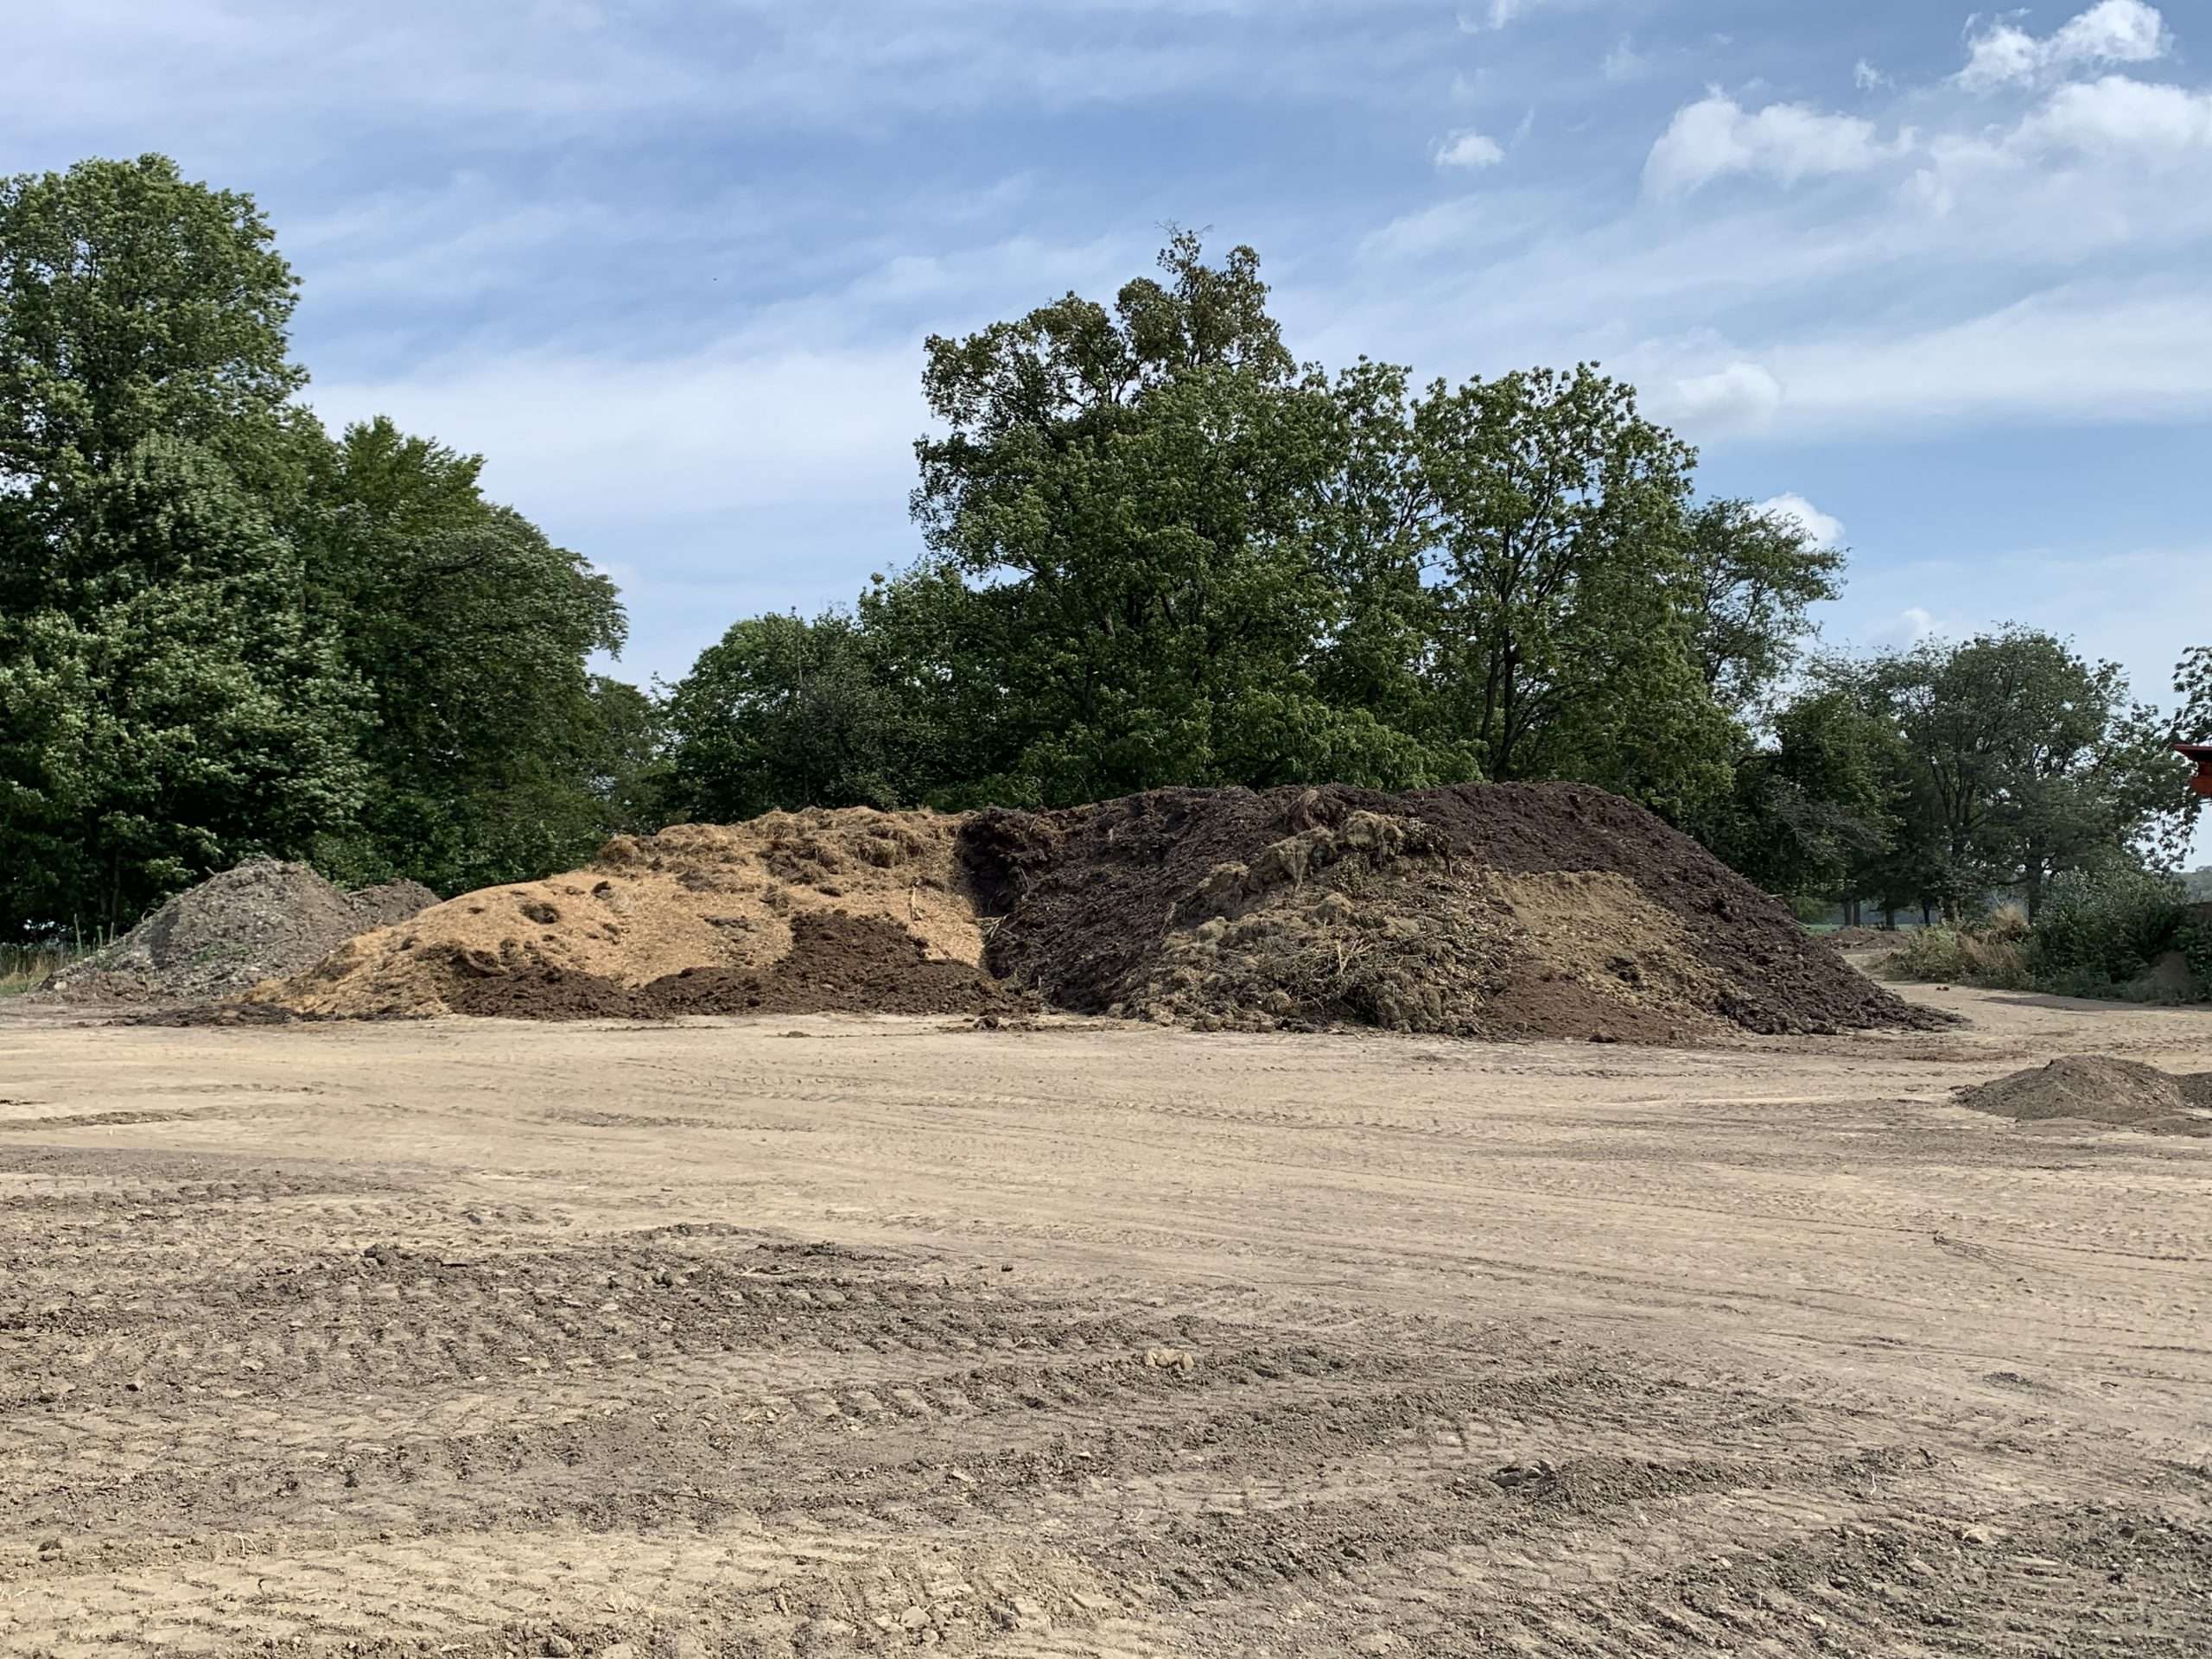
When your annuals are dead, any vegetables have produced their last bounty and every last weed has been plucked after the first frost, it’s time to prepare for the winter ahead with more mulch. Consult with your local supplier to identify the product for you. As we always say—bark is best. This means you should be looking for a high bark content in your mulch choice because as it breaks down (which quality mulch is supposed to do) it is going to restore the most nutrients to your soil for the next growth cycle of your plants.
Here are a few more things to consider when it comes to mulching in the fall:
- Mulching is hard work- do it when the weather is more tolerable and refresh with a thin, cosmetic layer in the spring
- Plant growth this time of year is slow and perennials are well established- you won’t have to worry about suffocating or damaging new growth in the spring
- As always, spread a thick layer—anywhere from two to four inches is perfection!
We are not oblivious to the fact that most people just don’t love to mulch as much as we do, and most certainly not enough to do it twice per year. But, your landscape is an investment- in need of maintenance and proper protection like anything else in and around your home. As always, if you need help identifying the right landscaper to do the heavy lifting for you—give us a call.
The Dirt On Topsoil Products
We know there are so many options when it comes to choosing the right soil for your project, it can be downright confusing! But, it is so important to the well-being of your lawn or landscape to choose the right soil for the job. We decided to break this down for you a little further…
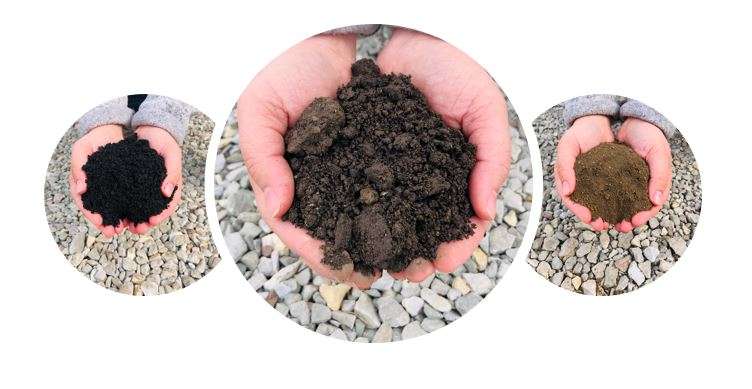
- Pulverized Topsoil (BEST FOR SEEDING AND GRADING)
- Our inventory manager takes great care in purchasing local, quality topsoil with low clay or sand content. Once pulverized at our facility, it is fine and easy to spread. Topsoil will hold his structure once placed, which is the basis for its recommendation to fill holes or bare places in your lawn. If you plan to re-seed your lawn or start fresh, regular topsoil is best for the job!
- Topsoil Plus (BEST FOR PLANTING)
- We combine our pulverized topsoil and compost in this 50/50 blend! Unique to this mix, the compost will add vital nutrients for your plants and the structural integrity of topsoil will keep the shape of the application over time. Topsoil Plus and other similar topsoil/compost blends are a perfect start for new vegetable or flower beds. Please note- topsoil mixes do not have the same drainage components needed specifically for container plantings!
- Compost (BEST AS AN AMENDMENT)
- The benefits of compost are endless in your garden or landscape. When mixed in with existing topsoil (we do not recommend planting directly into compost), it will enrich your soil by encouraging the production of beneficial bacteria and fungi that break down organic matter to create humus, a nutrient-filled material. Humus helps your soil retain moisture, loosens heavy clay soils to improve aeration and drainage. Composts with high organic content will be the most beneficial! Amending the soil of new planting space with existing topsoil is an ideal application for compost.
- Please be aware of the “bathtub affect” which occurs when planting in heavy soil. If your soil is not already largely amended, be sure when transplanting to fill in with the same soil the plant is used to, even if it is heavy clay. Many resources suggest adding amendments such as compost to the backfill, but a lighter mix surrounded by heavy clay soil (the norm in Indiana) will result in trapped water and suffocated roots, eventually killing your plant.

Lending a Helping Hand
As a small, family owned business, being involved in our local community organizations has been important to us since day one. Whether you are a large non-profit group hosting a day of service, an athletic team, or a Boy Scout troop, we are proud to have been able to help groups of all sizes and purposes grow by serving their individual needs.
Donations
Each year, we give away a certain amount of product for various projects from community gardens to vouchers for auctions and fundraisers. If your community group has an upcoming service project that requires landscape supplies, reach out and tell us about your project as soon as you can!
Fundraisers
Churches, clubs, and athletic teams have all been able to benefit from our mulch fundraisers to cut down on their participation fees, or pay for upcoming learning opportunities. With guidance, participants are able to set their own pricing on our product, and it sells itself- everybody needs mulch!
Give Back Program
Our Give Back program is a no brainer. If an organization has a need for any kind of fundraising, this program keeps on giving. We offer 10% back on any sale at Musselman’s made on the organization’s behalf throughout the entire year—all the customer has to do is mention it at the time of the order and 10% will be given back to the club.
Our partnerships lend a helping hand in the success of our community organizations to ensure that great things continue to happen here. Be sure to check out our Facebook page to see past projects we have been fortunate enough to help out with! No matter the needs of your church, club, school, or team-- we are here to help, from the ground up.
Landscape To-Dos | Early Spring Edition
You may be dreading these words, but we are excited to say it is officially time to get back to work in your backyard! The very first day of Spring has come and gone, and there might even be a 48-hour window this weekend with no rain or snow in central Indiana (key word: might!). That is a surefire sign it's time to get some refreshed mulch in those flower beds and actually start the outdoor improvement projects you've been dreaming about through the long winter.
Don't know where to start? Here are a few things to keep in mind this time of year, so you aren't stuck with all the work right before the guests arrive for your race day celebration or daughter's graduation party.
- Spring Clean-up: Remove the remaining leaves and debris from your gutters and planting beds, clear the unwanted brush and growth out of your yard and finish up by cutting back dead foliage before the new growth kicks in. Prioritize edging your beds as a part of this process- it will help you effectively keep your mulch in place and deter the lawn from extending its boundary.
- Mulch: Refresh your landscape beds with a few inches of mulch. Not only does it make your planting areas look neat, but it will help retain moisture in the soil and will keep roots cool in the upcoming summer heat. When mulch breaks down, it restores much-needed nutrients to your soil. If your old mulch is caked together and not decomposing well, remove most of it before you apply 2-3 inches of fresh product. For more information about mulch options and best practices, call our office to speak to a customer service representative!
- Equipment: In the early spring days, it is important to ensure your lawn mower and irrigation systems are ready to roll when you need them!
If you are as excited as we are about Spring, you are anxious to get back into the garden and beautify your outdoor living space. Continue to keep an eye on that Indiana weather- you will want to wait until after the frost dates have cleared to introduce most new plants to your beds. The steps above for early spring will set up your landscape for success this season!
Welcome!
Beginning as a simple mulch operation, Musselman has only grown since our roots were first planted in the 1980s. Since then, you have relied on our advice, expertise and high quality products. We are your one-stop shop for all things landscaping, and now your one ONLINE stop for valuable information! We are thrilled to interact with each of you more often through the launch of our new blog page.
We want our blog to be a resource you value, which is why we will focus on gardening tips, answering your questions, bringing you the latest trends in outdoor living, and highlighting what we have going on at Musselman Landscape Solutions- from the ground up!
So, be sure to bookmark this page, follow us on Facebook and Instagram or do what you need to do to stay up-to-date with our posts. If you have a question regarding anything under the sun and in your landscaping (chances are, someone else out there is wondering about it, too!) let us know by emailing us, and we will feature it right here!